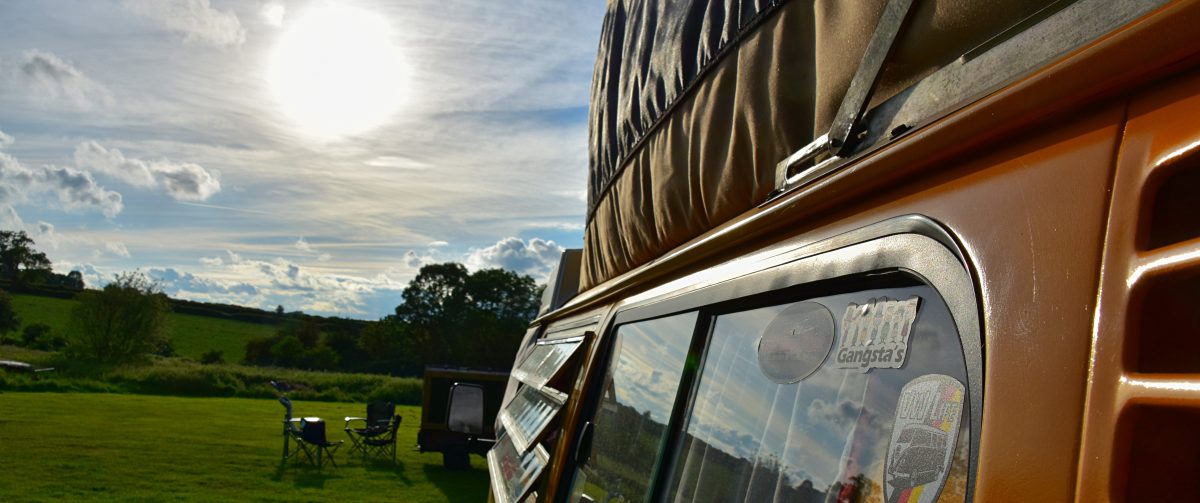
Major is a 1977 Westfalia Campmobile who lived all his life in Santa Cruz, California before coming to live with us in early 2011. He has been looked after in America and used a lot, this carried on with us and we used him for lots of adventures here in the UK. The bodywork, upholstery and engine need some tlc to bring him back to life and for the past couple of years has been resting.
Here he is when we got him home


We sorted the curtains out, wash & brush up, alloy wheels and some blankets and we where ready for action!


So, last September came and we decided to do a full refurbishment starting with the bodywork, chassis, running gear followed by the interior, cabinets etc. Me and my Dad did a survey on the bodywork to see what needed attention. The sliding door, cab door, left hand battery tray and part of the bodywork was found to be rotten. The motor has a misfire and the oil cooler needs relocating (or a Subaru conversion 🙂 ).


The first bit to tackle was the sliding door, there are a couple of drilled holes which do a good job of letting water spray in and allowing the door to rot from the inside out. Some subtle repairs and a respray sorted the door out nicely!


Next up, the left hand front door, the door skin was cracked and bits rattled loose when the door is opened and closed. We have de skinned it, replaced the rotten parts, rewelded the brace bars up and, as it stands, we are building it back up again.


With the door fully built back up, painted and lacquered, we considered it a job well done as it looks very good indeed, the paint has a nice shine to it now!


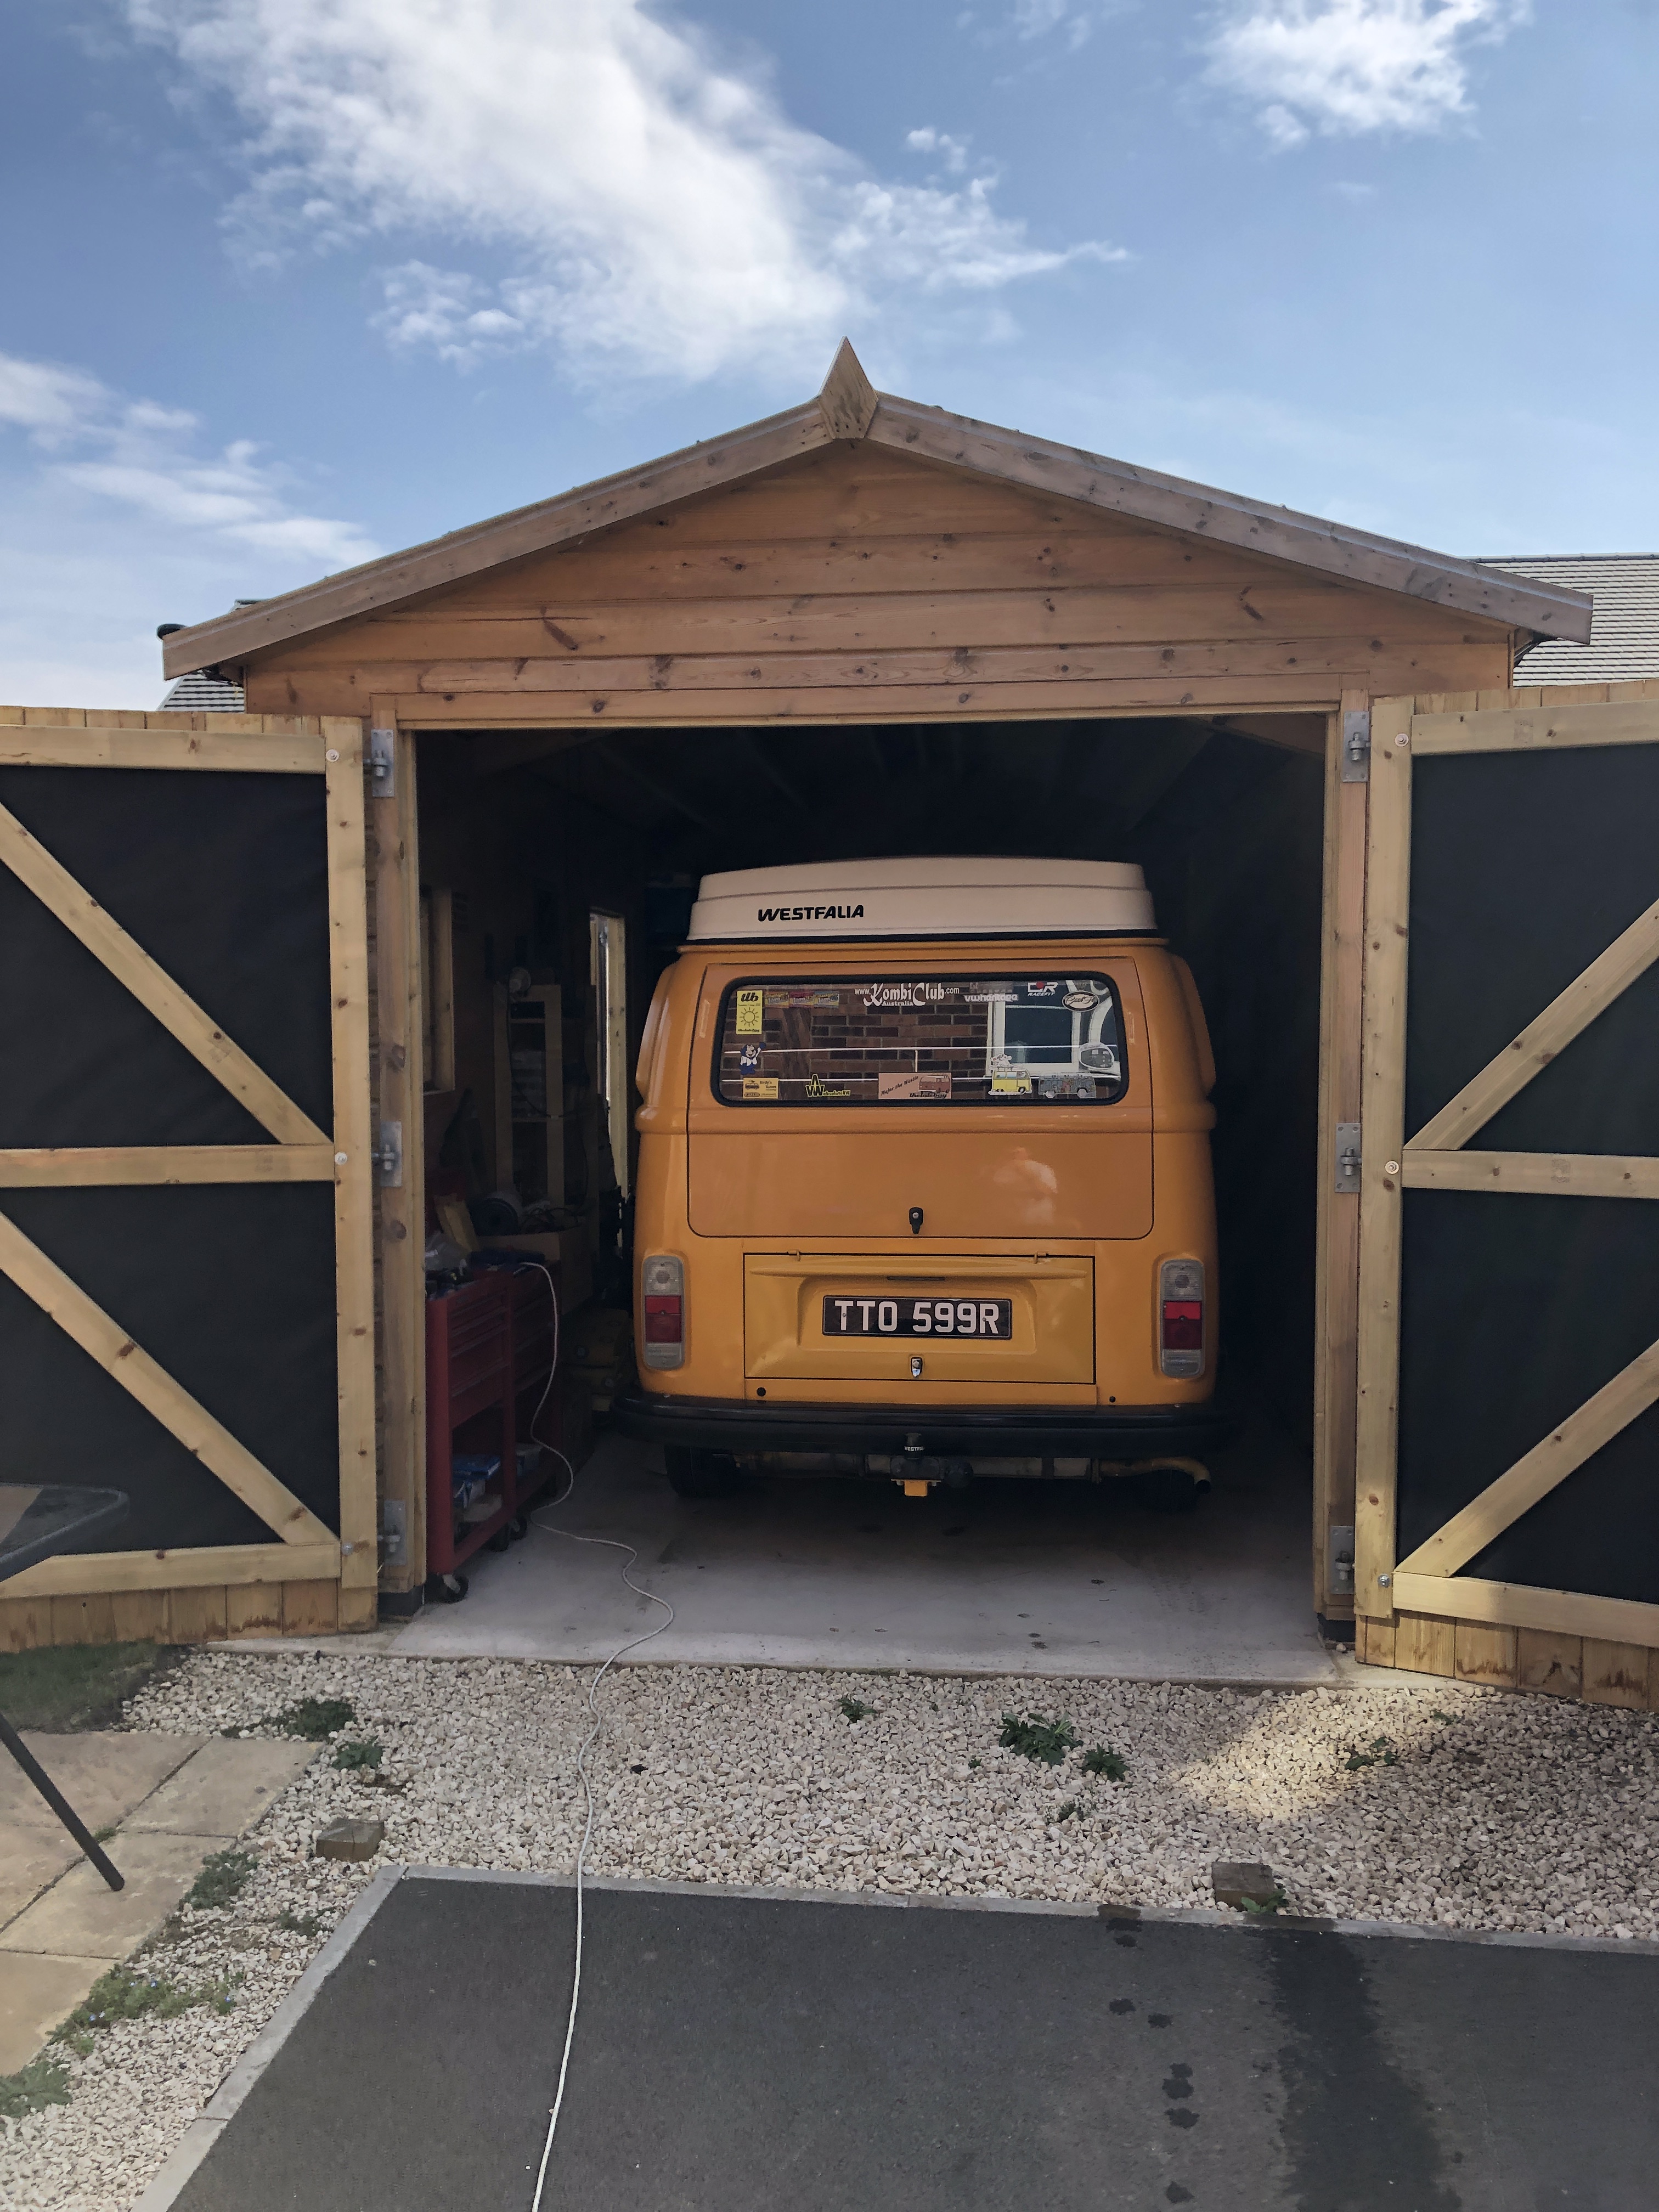
With that out of the way, Major has been moved to the garage for the welding to be done including a new front panel. I’m hoping we haven’t got too much to do but the mess a reputable VW specialist made didn’t do the chassis any good. This will be sorted along the way. Before we could move him, we had to take the roof off as he is too tall to fit in the garage!


Now we have all of the workshop facilities to work with, a start could be made on the bodywork. One of the easier bits to “sort” was the small section of rotten metal on the left hand side of the engine bay. This turned into a 2″ square section on the outer bodyskin and a 1″ piece on the inner D post and a complete new rear valance.


Nice and easy to sort, make sure any rust is cleaned up and treated with Vactan and a good coat of paint before welding up the new metal into place. We used a Custom and Commercial rear valance, its was very well made and fit as it should!


Looks quite good, we ground back and filled the weld holes up, flattened the filler off nicely, etch primed and high build primed the repair up until respray time. Very pleased with the end result 🙂
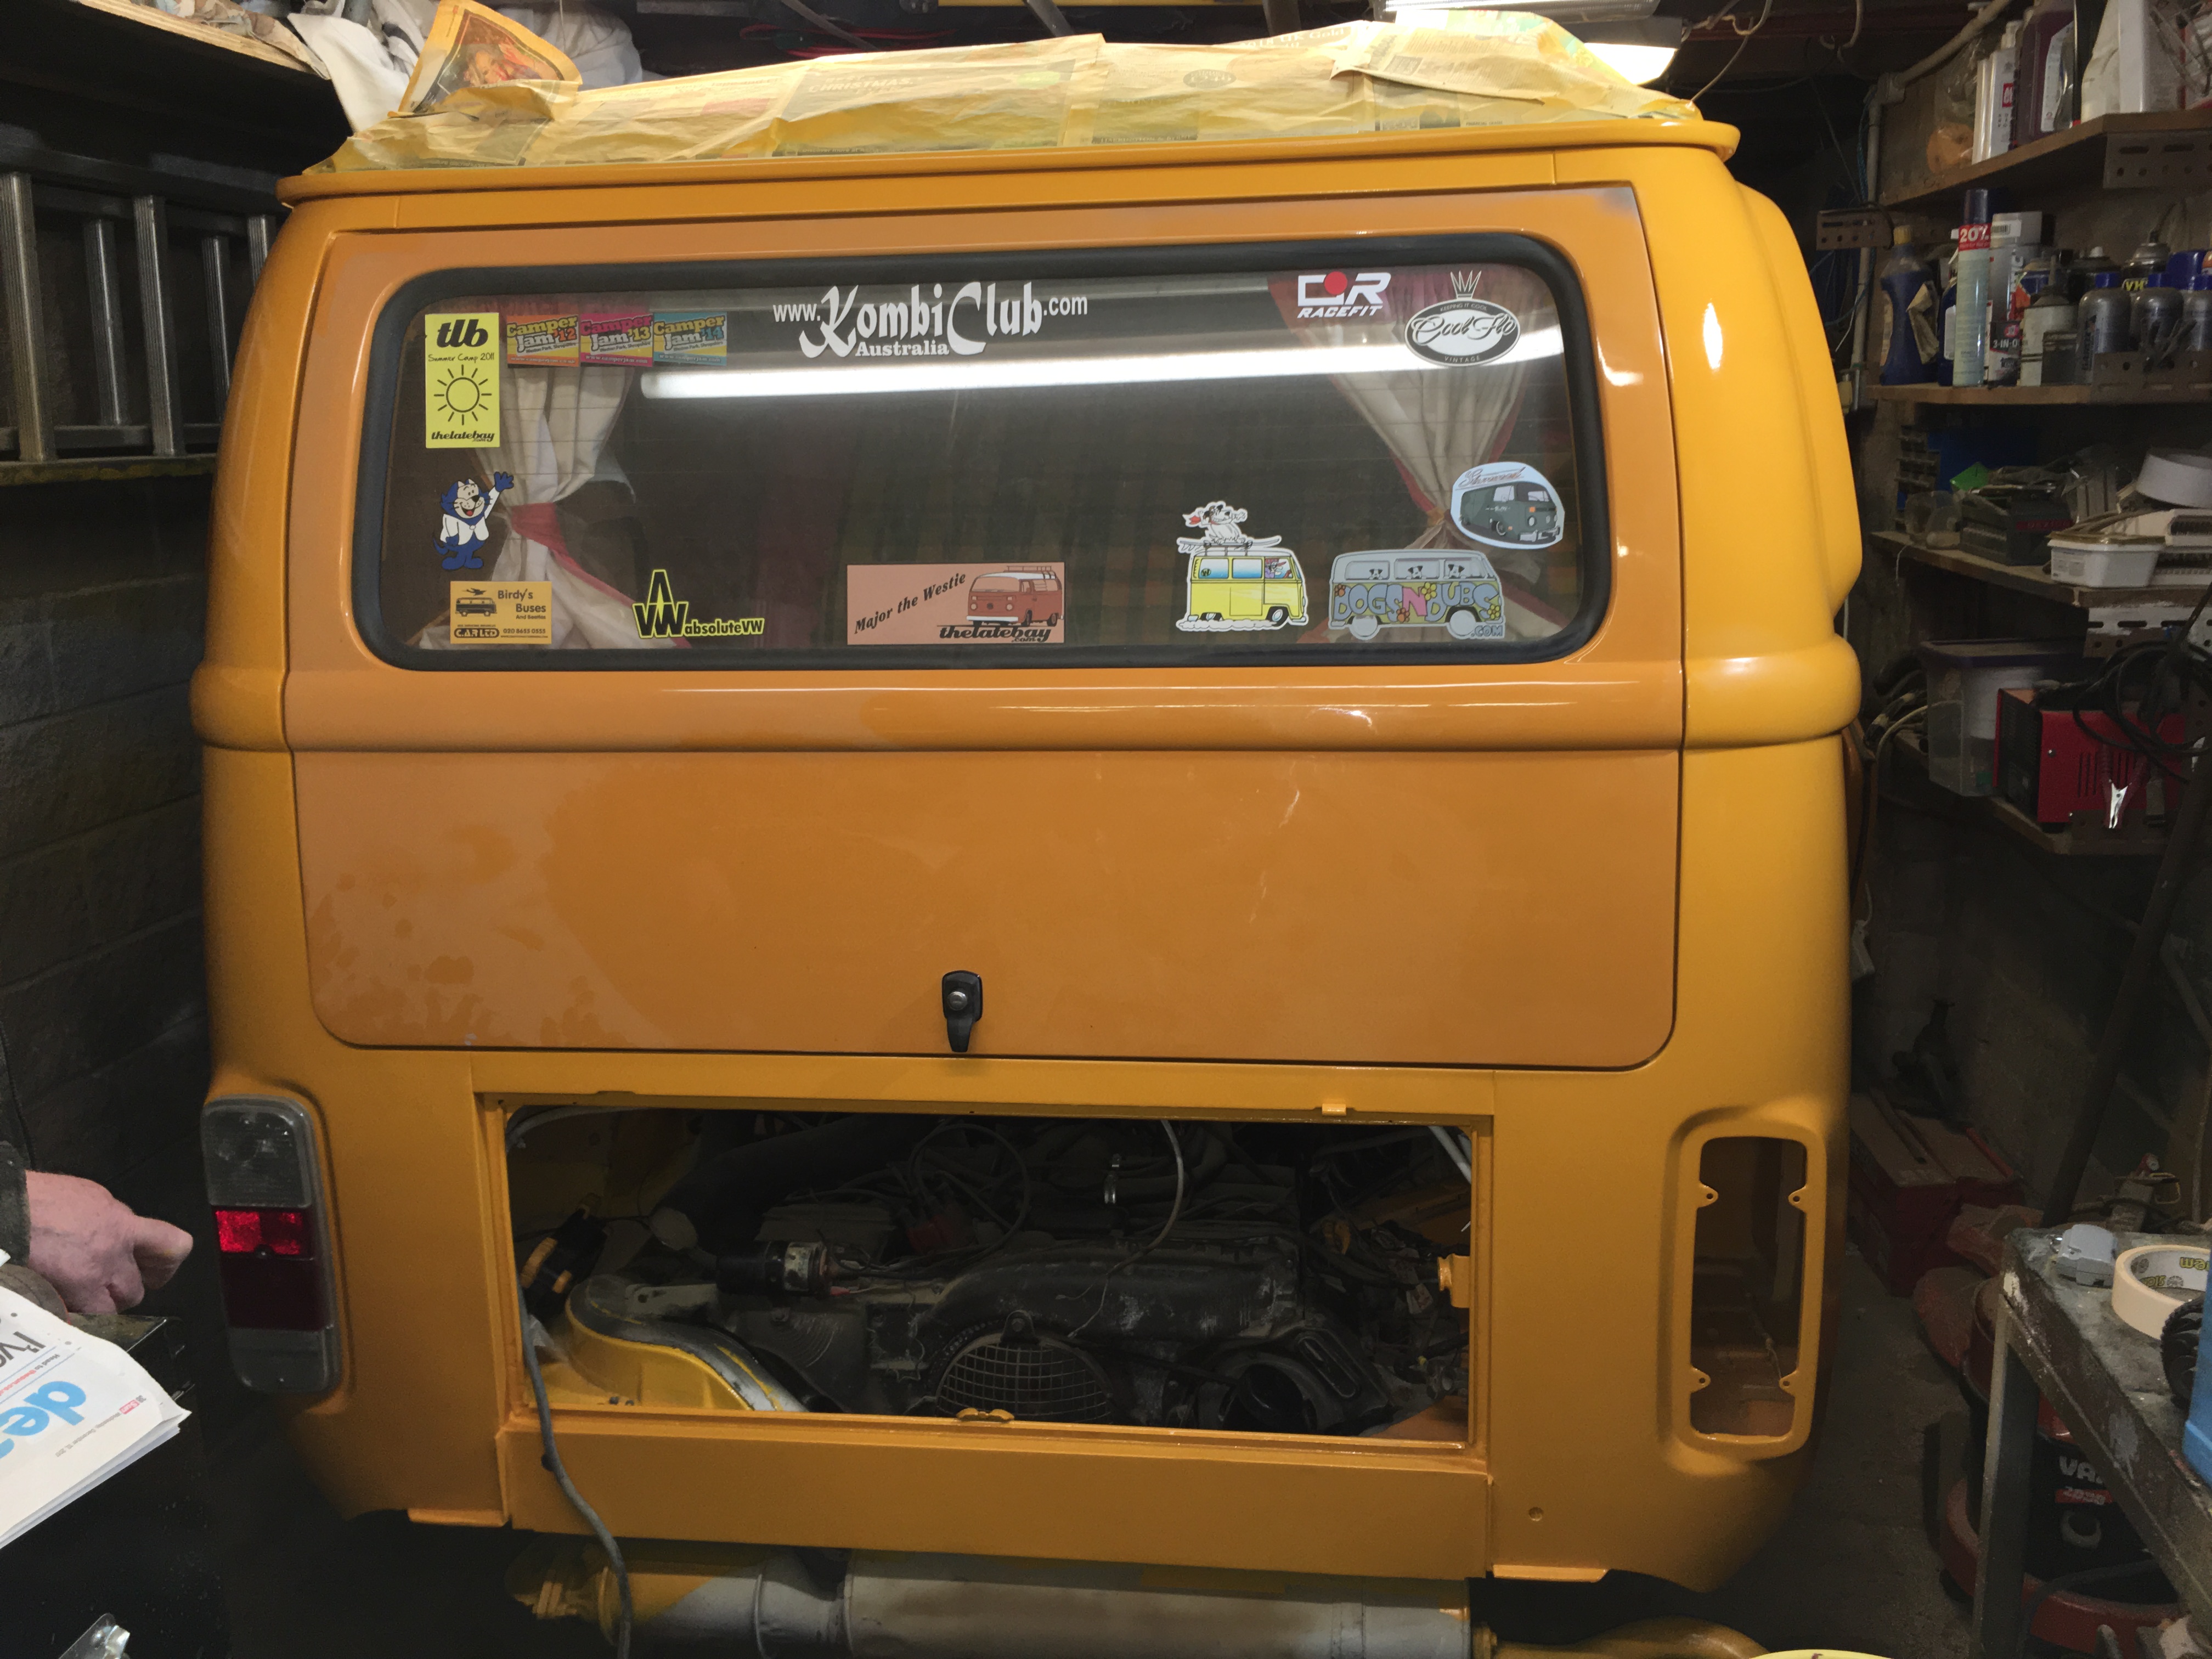
Now that the rear valance was sorted, we moved on to the front panel as it always let water in when it rained. There was some areas around the windscreen where the rust was bubbling away, we decided to replace the whole front panel and do a proper job of it and not worry again


Here is the reason why it leaked! The front panel had been replaced at some point as, we later found out, the front had been damaged and the air box assembly located behind it had moved backwards towards the driver by 2 inches. Something else to sort out.
If only we knew the amount of work we had to do.

This is was faced us when the old panel was cut away:


We had to source a replacement air box assembly, weld a new inner windscreen panel in, repair the plinth which the front panel sits on and align everything to ensure the windscreen will fit in its correct position. Quite daunting.


All in all, it went well and now its painted, the effort paid off!


We successfully refitted the headlights, indicators, windscreen and wipers, repainted the dashboard, connected the wiring back up and electrically tested everything. Whilst we was doing this, we reinstated the heated rear window too. The dashboard has the benefit of an oil pressure gauge for monitoring the engine behaviour.


Dashboard:


That’s another major achievement completed and looking good.
We managed to source a genuine left hand battery tray. New Genuine VW parts are becoming more difficult to source for the time being due to difficulties within Volkswagen.
Sooner than patch the existing one, we replaced it. A nice, easy fix to do, nothing rotten at all, old battery tray out, new one in, seam sealed and sorted. We have not painted it yet, this will take place when we repaint the inside of the engine bay. All in all, a job well done!


As of today, its the inside of the cab getting some attention, namely the wheelarch tubs, floor and walkthrough floor. These areas are mostly in excellent condition, two patches needed welding in, each behind the seatbelt anchor point. Moisture got trapped in between a bracing bar and the top of the wheelarchtub, roadside, trapping water and rotting upwards. We simply cut two square sections out and welded new steel in. Sorted and ready for rubbing back, priming and paint.


We have been busy these past couple of months, finishing painting the cab floors, and sorting out an area of rust where the tailgate seal sits. Both of these jobs took time but they are finished now, the cab floor was easiest whilst the seal channel had a rotten section which needed cutting out and a new section welding in:


Cab floors looking fresh!
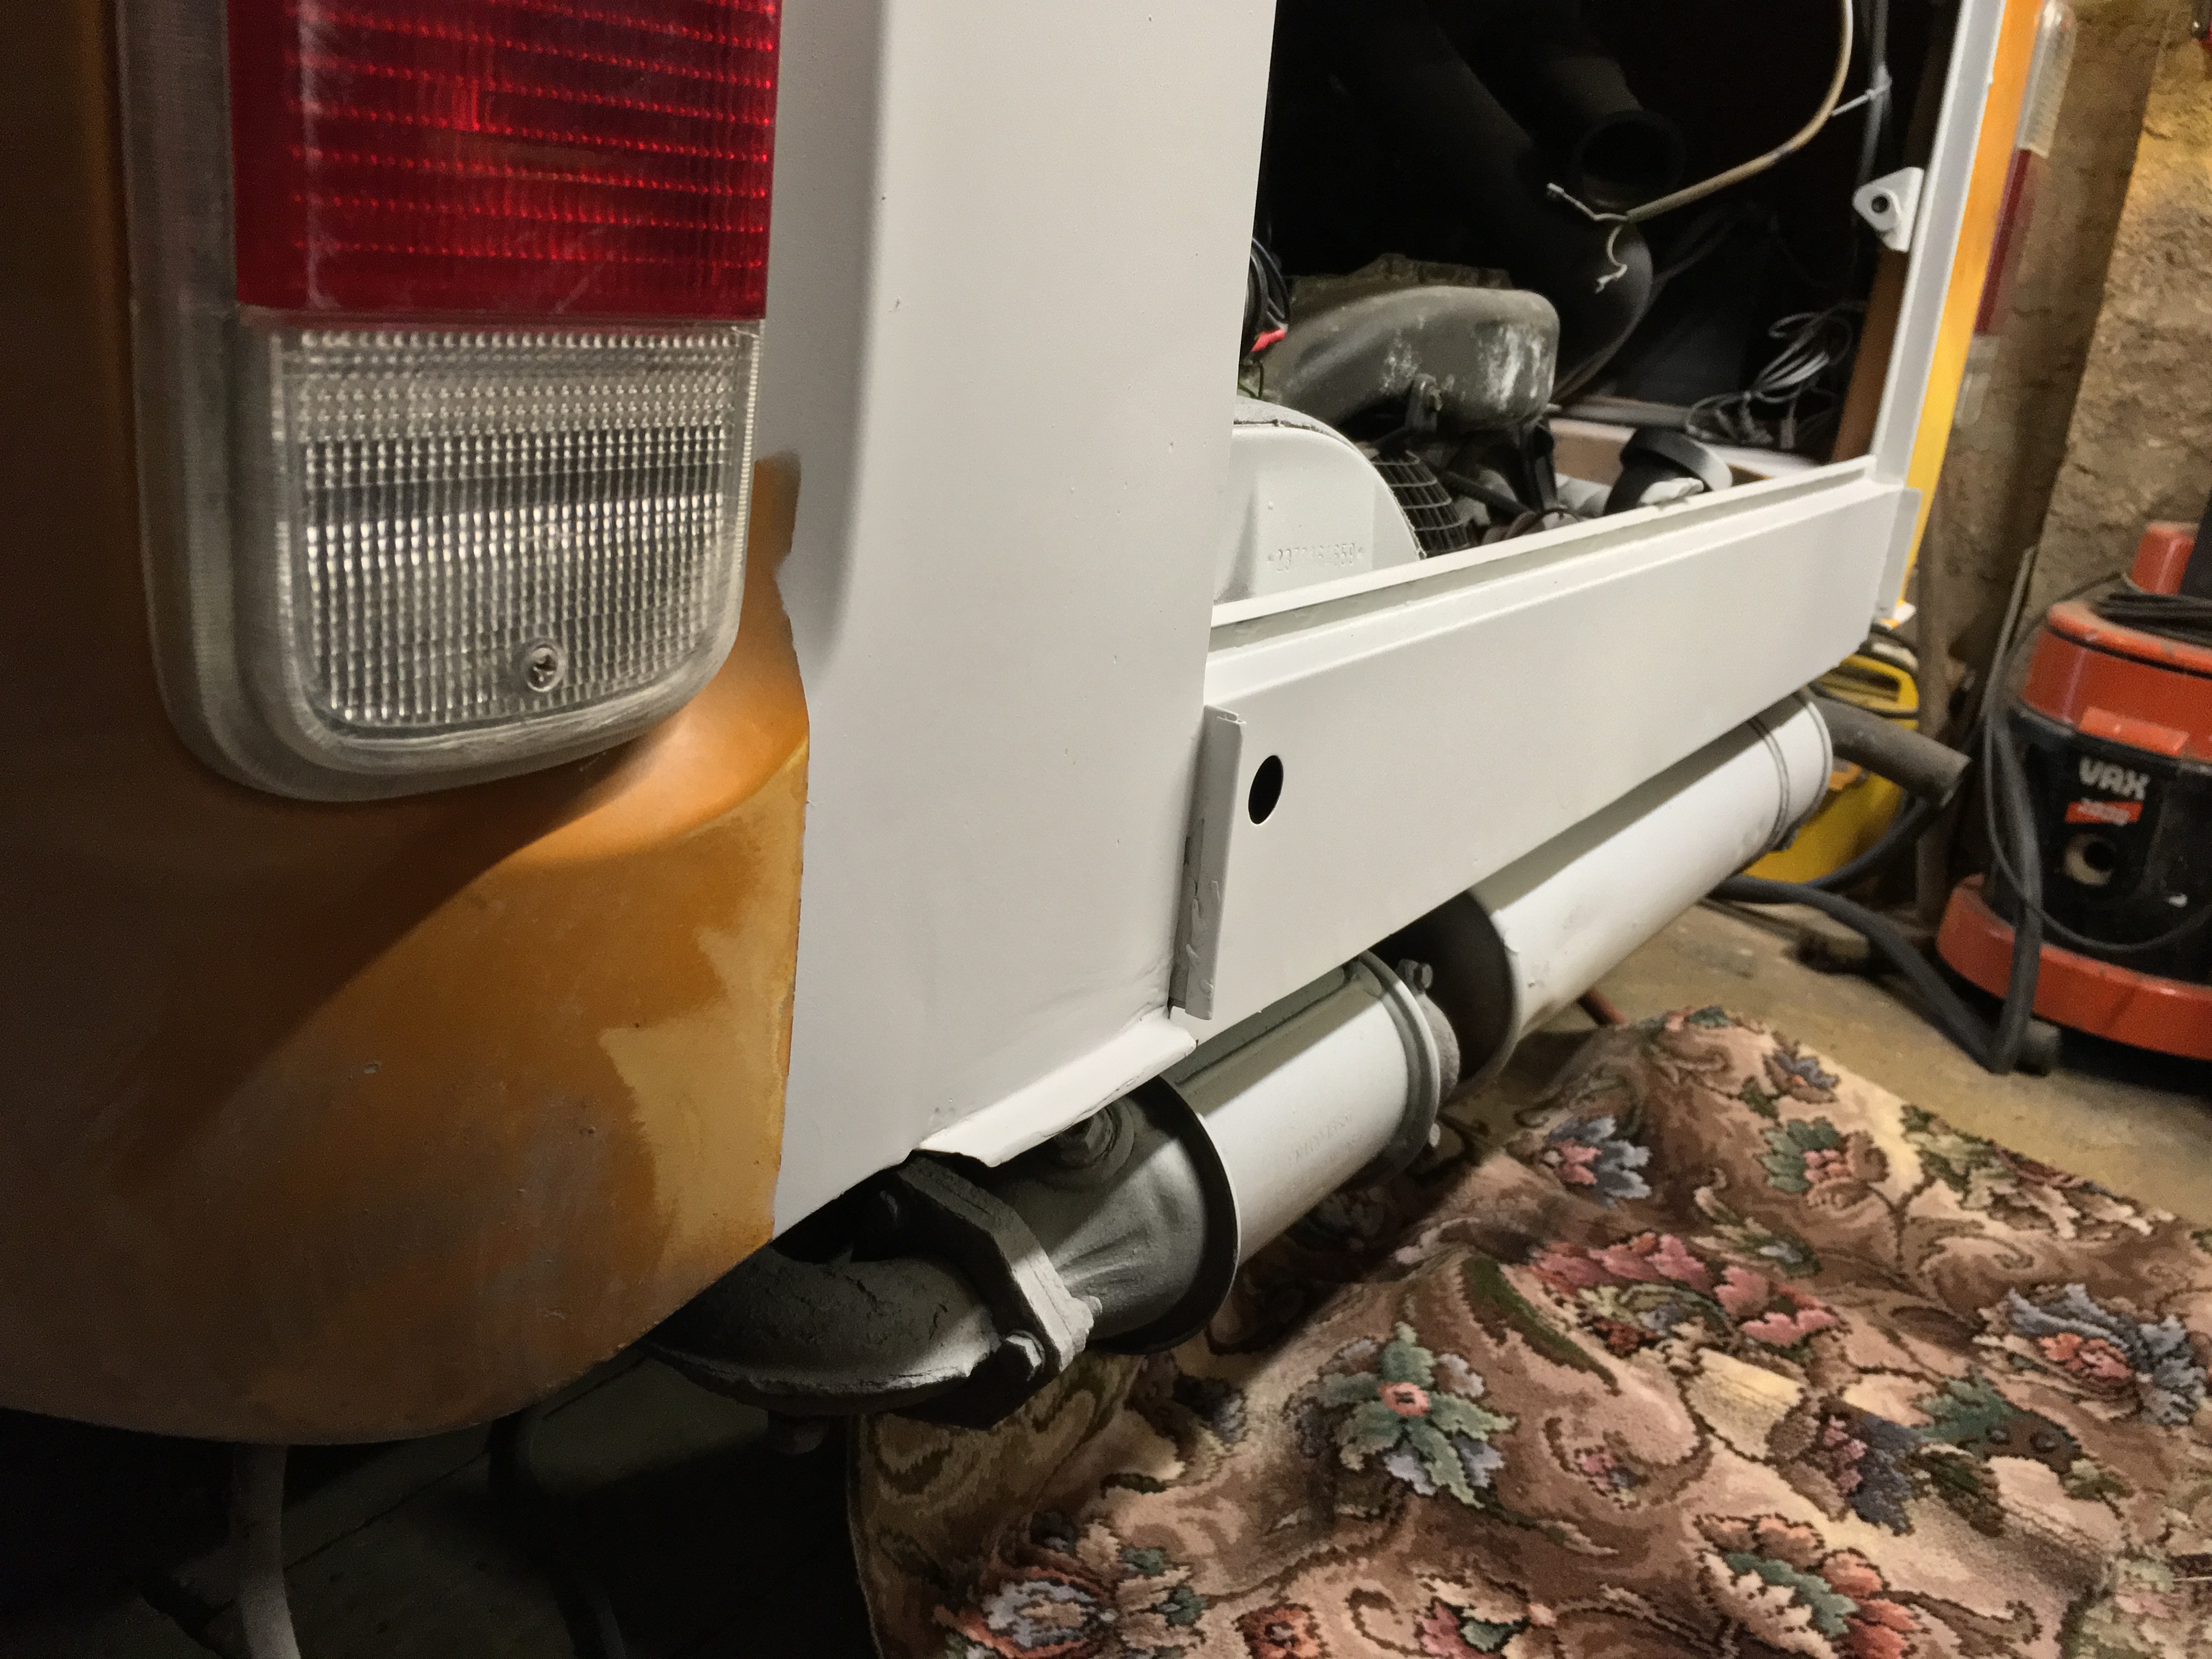
The tailgate section was a bit more tricky as the area which had the rotten bit was inside the channel, behind where the seal sits, forming the rear bottom corner piece. It was around six inches long, some new metal formed to shape and the repair was done.


And all done, painted and the rear light clusters put back on. The tailgate hasn’t been repainted as yet!
With that done, we have turned our attention to the complete right hand side of the bodywork, which required the rear window removing..we found some corrosion & pitting under the seal, which got sorted out okay. The lower sills had some corrosion, which cleaned up nicely, the running gear on the right rear has been removed for repainting and the wheel arch lips have been rust treated.


The bottom right image shows rust coming through some underseal, the issue comes from a professional VW restorer being paid to paint the rust spots with epoxy primer and Dinitrol treat it all..the rust spots had been left well untouched.
Following on from the last update, we have sorted the right front and rear wheelarches and found a two inch square section of rotten steel which was easily replaced. Little steps and all that! Moving back to the wheelarches, it looks like the Dinitrol was applied directly onto rust where stonechips had chipped the paint away, which was definitely not what should have happened.
Rear:
From this rusted and tatty mess


to a nice fresh looking arch which has been rust proofed, primered, stone chipped and had two coats of yellow paint. The suspension and brakes have had new rubbers, brake cylinders and steel lines along with handbrake cable.


We took the same methodology with the front arch, including a new section of steel, which couldn’t have been avoided, it needed doing!


Up here, we will rebuild the brake caliper with new seals and a piston set, repaint it, derust the suspension arms, paint those and replace the steel brake pipe with new.


Chuffed to bits with the result, much neater and hopefully, it will last a good few years to come!
We will ensure the brakes are up to spec all round with essential components renewed when necessary, the pads and shoes are all low mileage and will last for years. The brake calipers went from rusty to as good as new, quickly!


I cant believe how far we have come since Major’s blog was last updated back in April, lots of good progress has been made and one slight setback delayed us by a couple of weeks.
Both of the wheelarches on the left hand side have been completed and they look good:


The front brakes have had the calipers rebuilt with new pistons and seals, the bodies cleaned up and a fresh coat of paint applied whilst the rear brakes have had new cylinders, new handbrake cables and the spring plate bushes replaced. The brakes have been bled all around to ensure they work correctly.


With that little list of items sorted out okay, I mentioned a slight setback which put us back a couple of weeks. Well, we needed some more paint, however, when we had painted the long, left hand side panel, it became obvious the colour was different to the rest..hence the setback!
But with some patience and a fresh coat of the correct colour, the whole of the bodywork had been fully resprayed!


All we need here is a damn good wash and polish to remove any dust gathered and Major will look great.
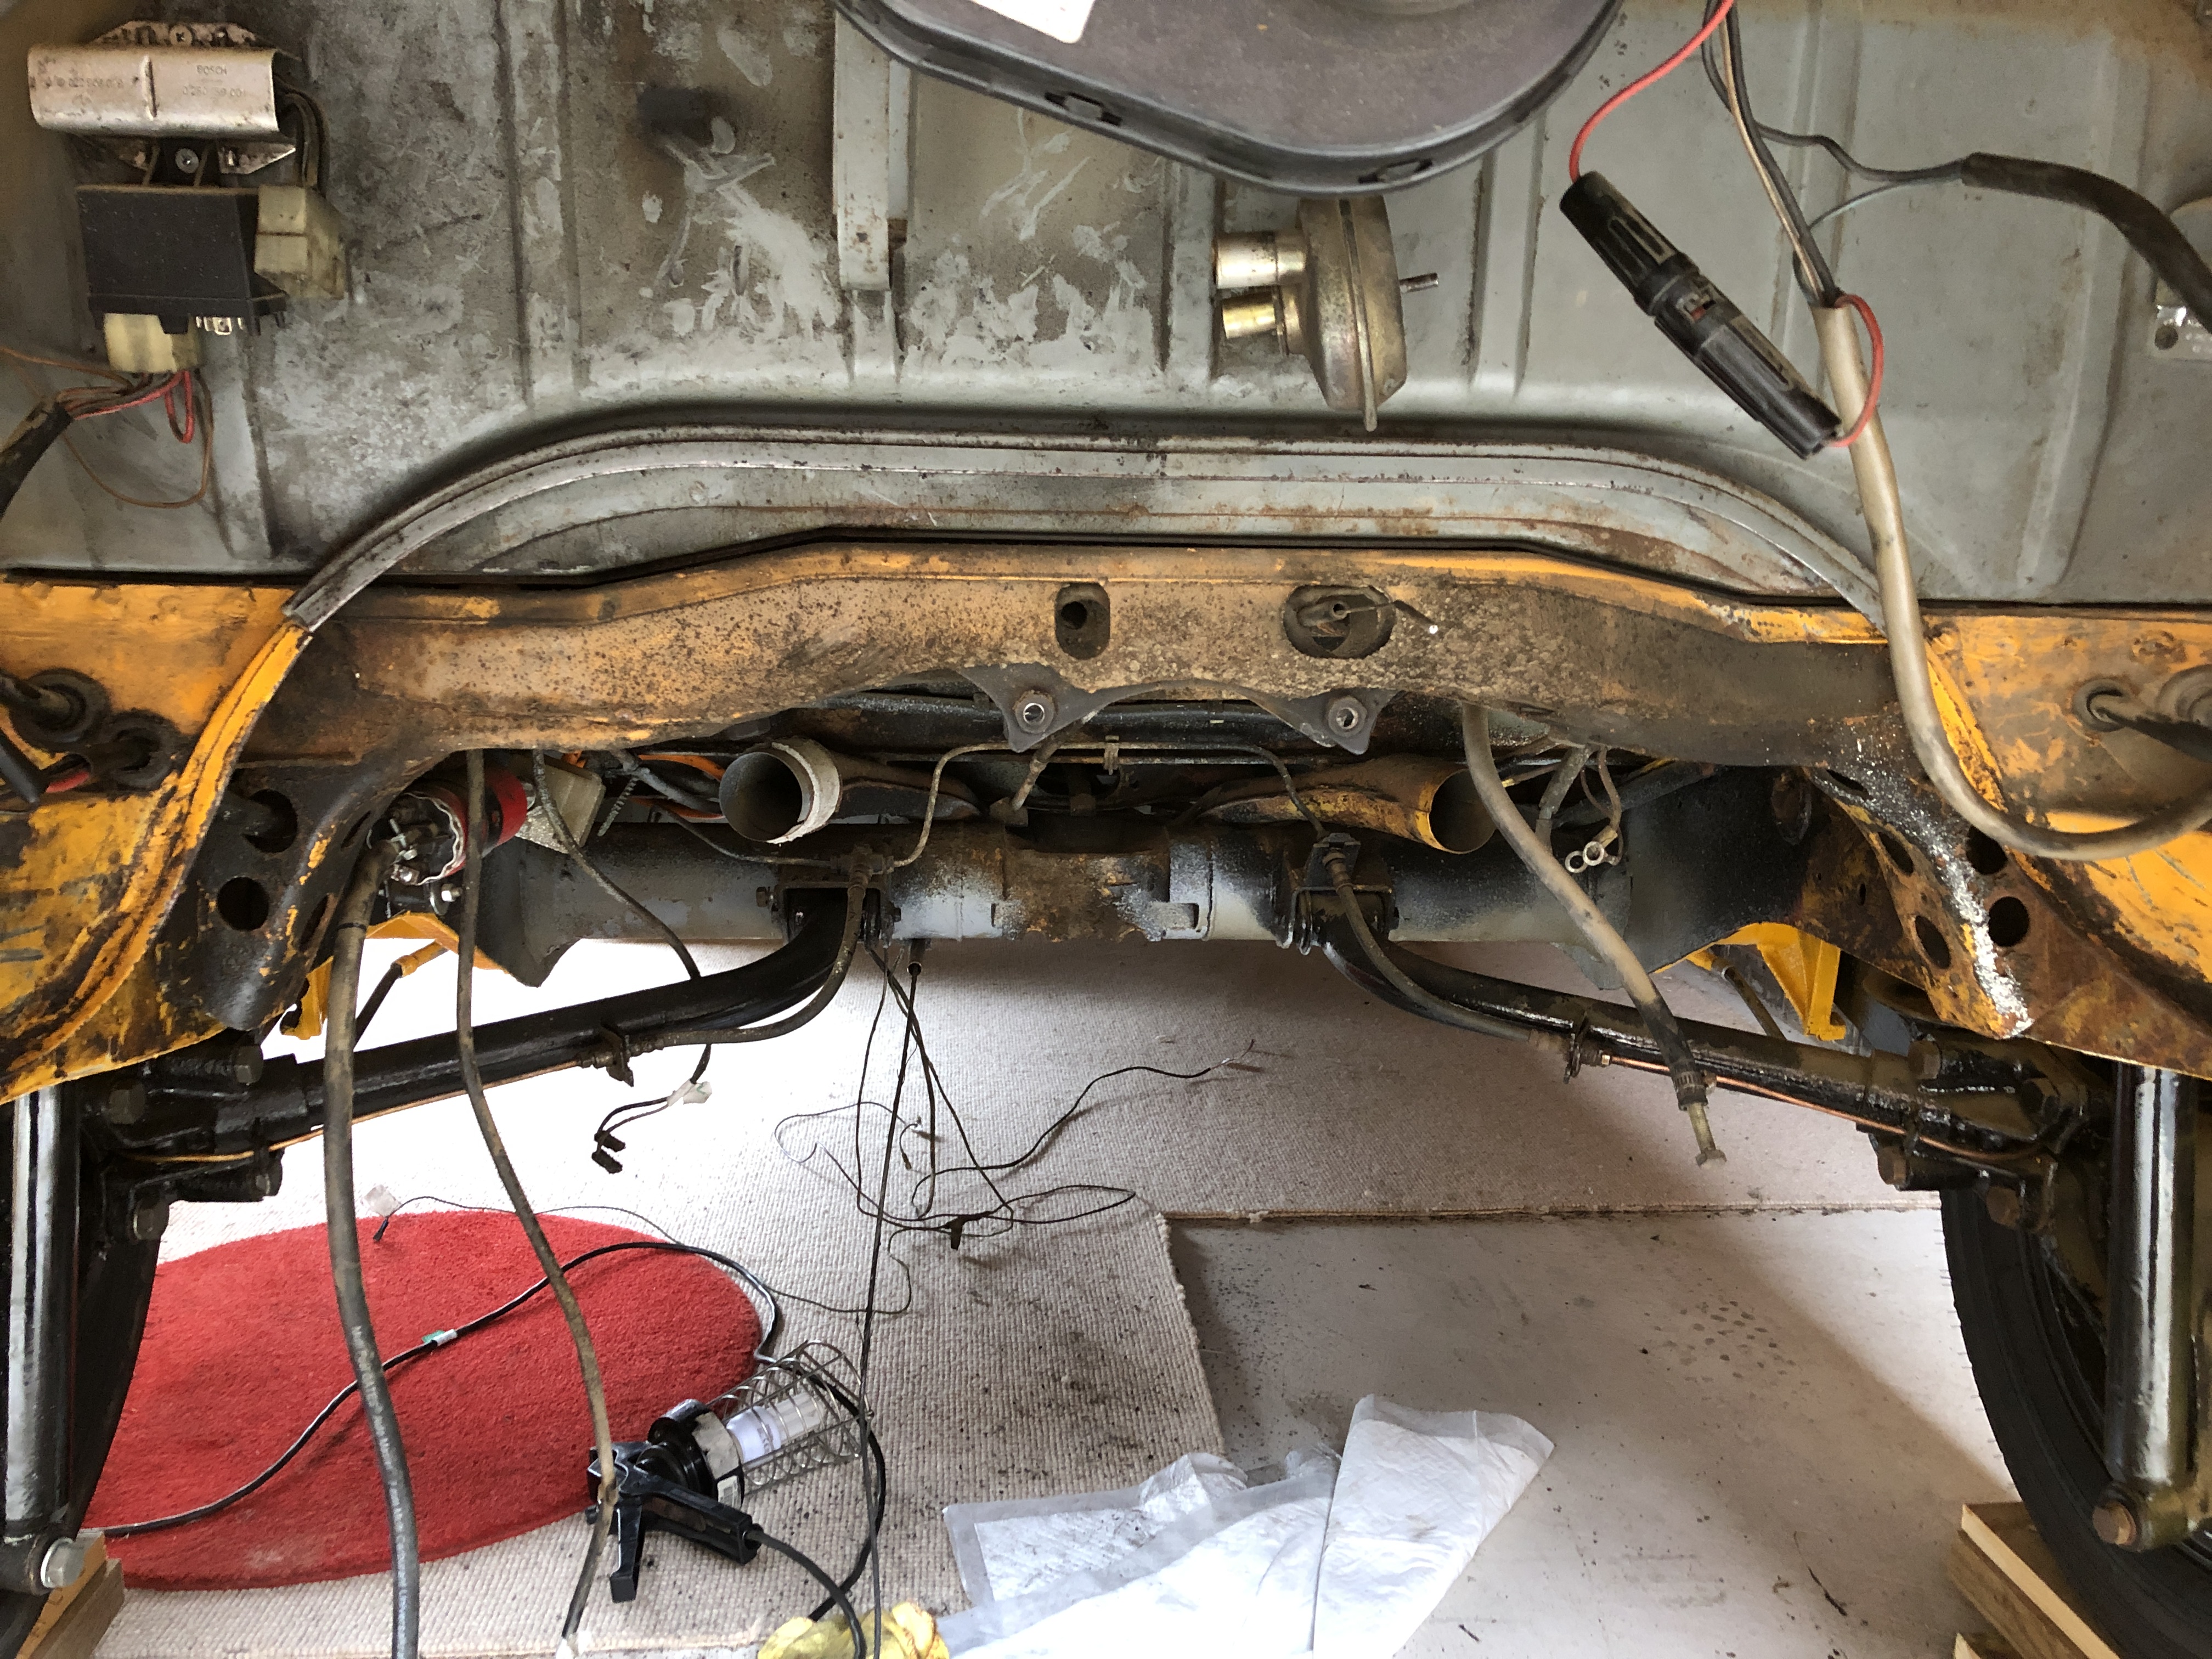
The chassis and under floor is next for sorting out, the rust coming through the Dinitrol is terrible, the lack of preparation has shown up all over, I will never use Absolute VW again, nor recommend them. The treatment comes off by rubbing your fingernail across it. Best way forward, remove it all, rust treat, red oxide prime, top coat of chassis paint then stonechip and possibly colour.


Overall, most of the rust is purely surface rust, there is no rot from what we have found and should come good. The chassis rails are fine too, as are the outriggers and floor beams. So, when we say rot free US Bay, we know it is indeed rot free!


After hours of endless scraping off underseal, road dirt and rust, we got the floor Vactan rust treated, red oxide primed, chassis black painted then two good coats of Dinitrol underbody sealant with rust inhibitor and a coat of Waxoyl over the top. Much better!


That should be nice and solid for a good few year to come! The pictures don’t do it justice because of the Waxoyl coating.
The roof was next up on the list of things to refurbish, it looked grim, dirty all over from 41 years of road debris sprayed on to it plus a bit of moss for good measure!


A good scrub with fibreglass cleaner, wash down with soapy water, a roughen up with some 320 grit sandpaper and the roof cap was ready to be painted. Paint was special fibreglass paint from SupplyShed in white – 2 coats of primer and 2 coats of gloss topcoat and it looked totally different!
The luggage rack clips also got a repaint in satin black, which made them look much fresher and a little touch of a Flat 4 badge for the front cap, rear roof had the Westfalia logo put back on, the roof bar mounts repainted and to follow, will be the small Westfalia prancing horse logo’s for the side.


I’m pleased how the roof ended up, I restored that in Major’s new home in the garage in our garden and as I write this, Major is being prepared to come home!
February 2019.
So, Major did arrive home safe and sound with work commencing straight away & work started immediately.


Rather than having the usual white bumpers, we tried Satin black (same as the dashboard), they look good with the main body colour, especially if we go with black on other body parts. Whilst at it, the front half of the roof was fastened back on..looks good!


And, as the roof cap was bolted and the factory captive nuts as they should be, I could then move on to sound deaden the roof and then layer it with aluminium insulation foil, which was a nice, simple job to do. I’ll do the same in other areas and then add some insulation when trim panels are refitted.


They was nice easy jobs to do! The next bit, sorting out the interior is going to be a longer term part of the project, daunting mind, as their is some woodwork to do. I figured it was easiest to strip it all out and start from their onward. What I didn’t expect was some 40 years of dirt and grime to be hiding away.


Disgusting!
As with most things on Major, he has more hidden accident damage, this time it looks like the long panel on the left hand side took a beating and, despite looking nice and straight on the outside, the cross bracing’s on the inside are all twisted.


Because of the work involved in sorting those out & the fact that the welds are mostly in tact, all it needed was to clean all of the bare metal up, rust treat any rust patches, seam seal any gaps and paint it up. It turned out good in the end!


Just needs re insulating and the trim panels refitting.
We had a window of opportunity with the weather recently and enjoyed temperatures as high as 18’C, ideal weather for refitting Major’s rear roof section. Ste cam over to help refit, it went very well and within a couple of hours the roof was on and fixed securely.


Meanwhile, I’m still pottering along sorting the interior with the area surrounding the rear right window sprayed up, louvre window refitted:


replacement panel trim fixed up and jailbars fitted:


panel gaps insulated, fuel tank sender hole covered and the engine inspection hatch painted in satin black:


Continuing with refitting the new panels, all of them have been refitted and the results look rather good. They are reproduction available from http://www.nlavw.com and the fit & finish is excellent, they just needed mounting holes drilling to correspond with the old trim.


When we stripped Major down, the old plywood cab headliner cracked and split in the middle, this has been sorted using 3mm thick Baltic Birch Plywood, varnished to match the plywood strips up in the roofline and refitted and LED lights fitted in place of the old lights.


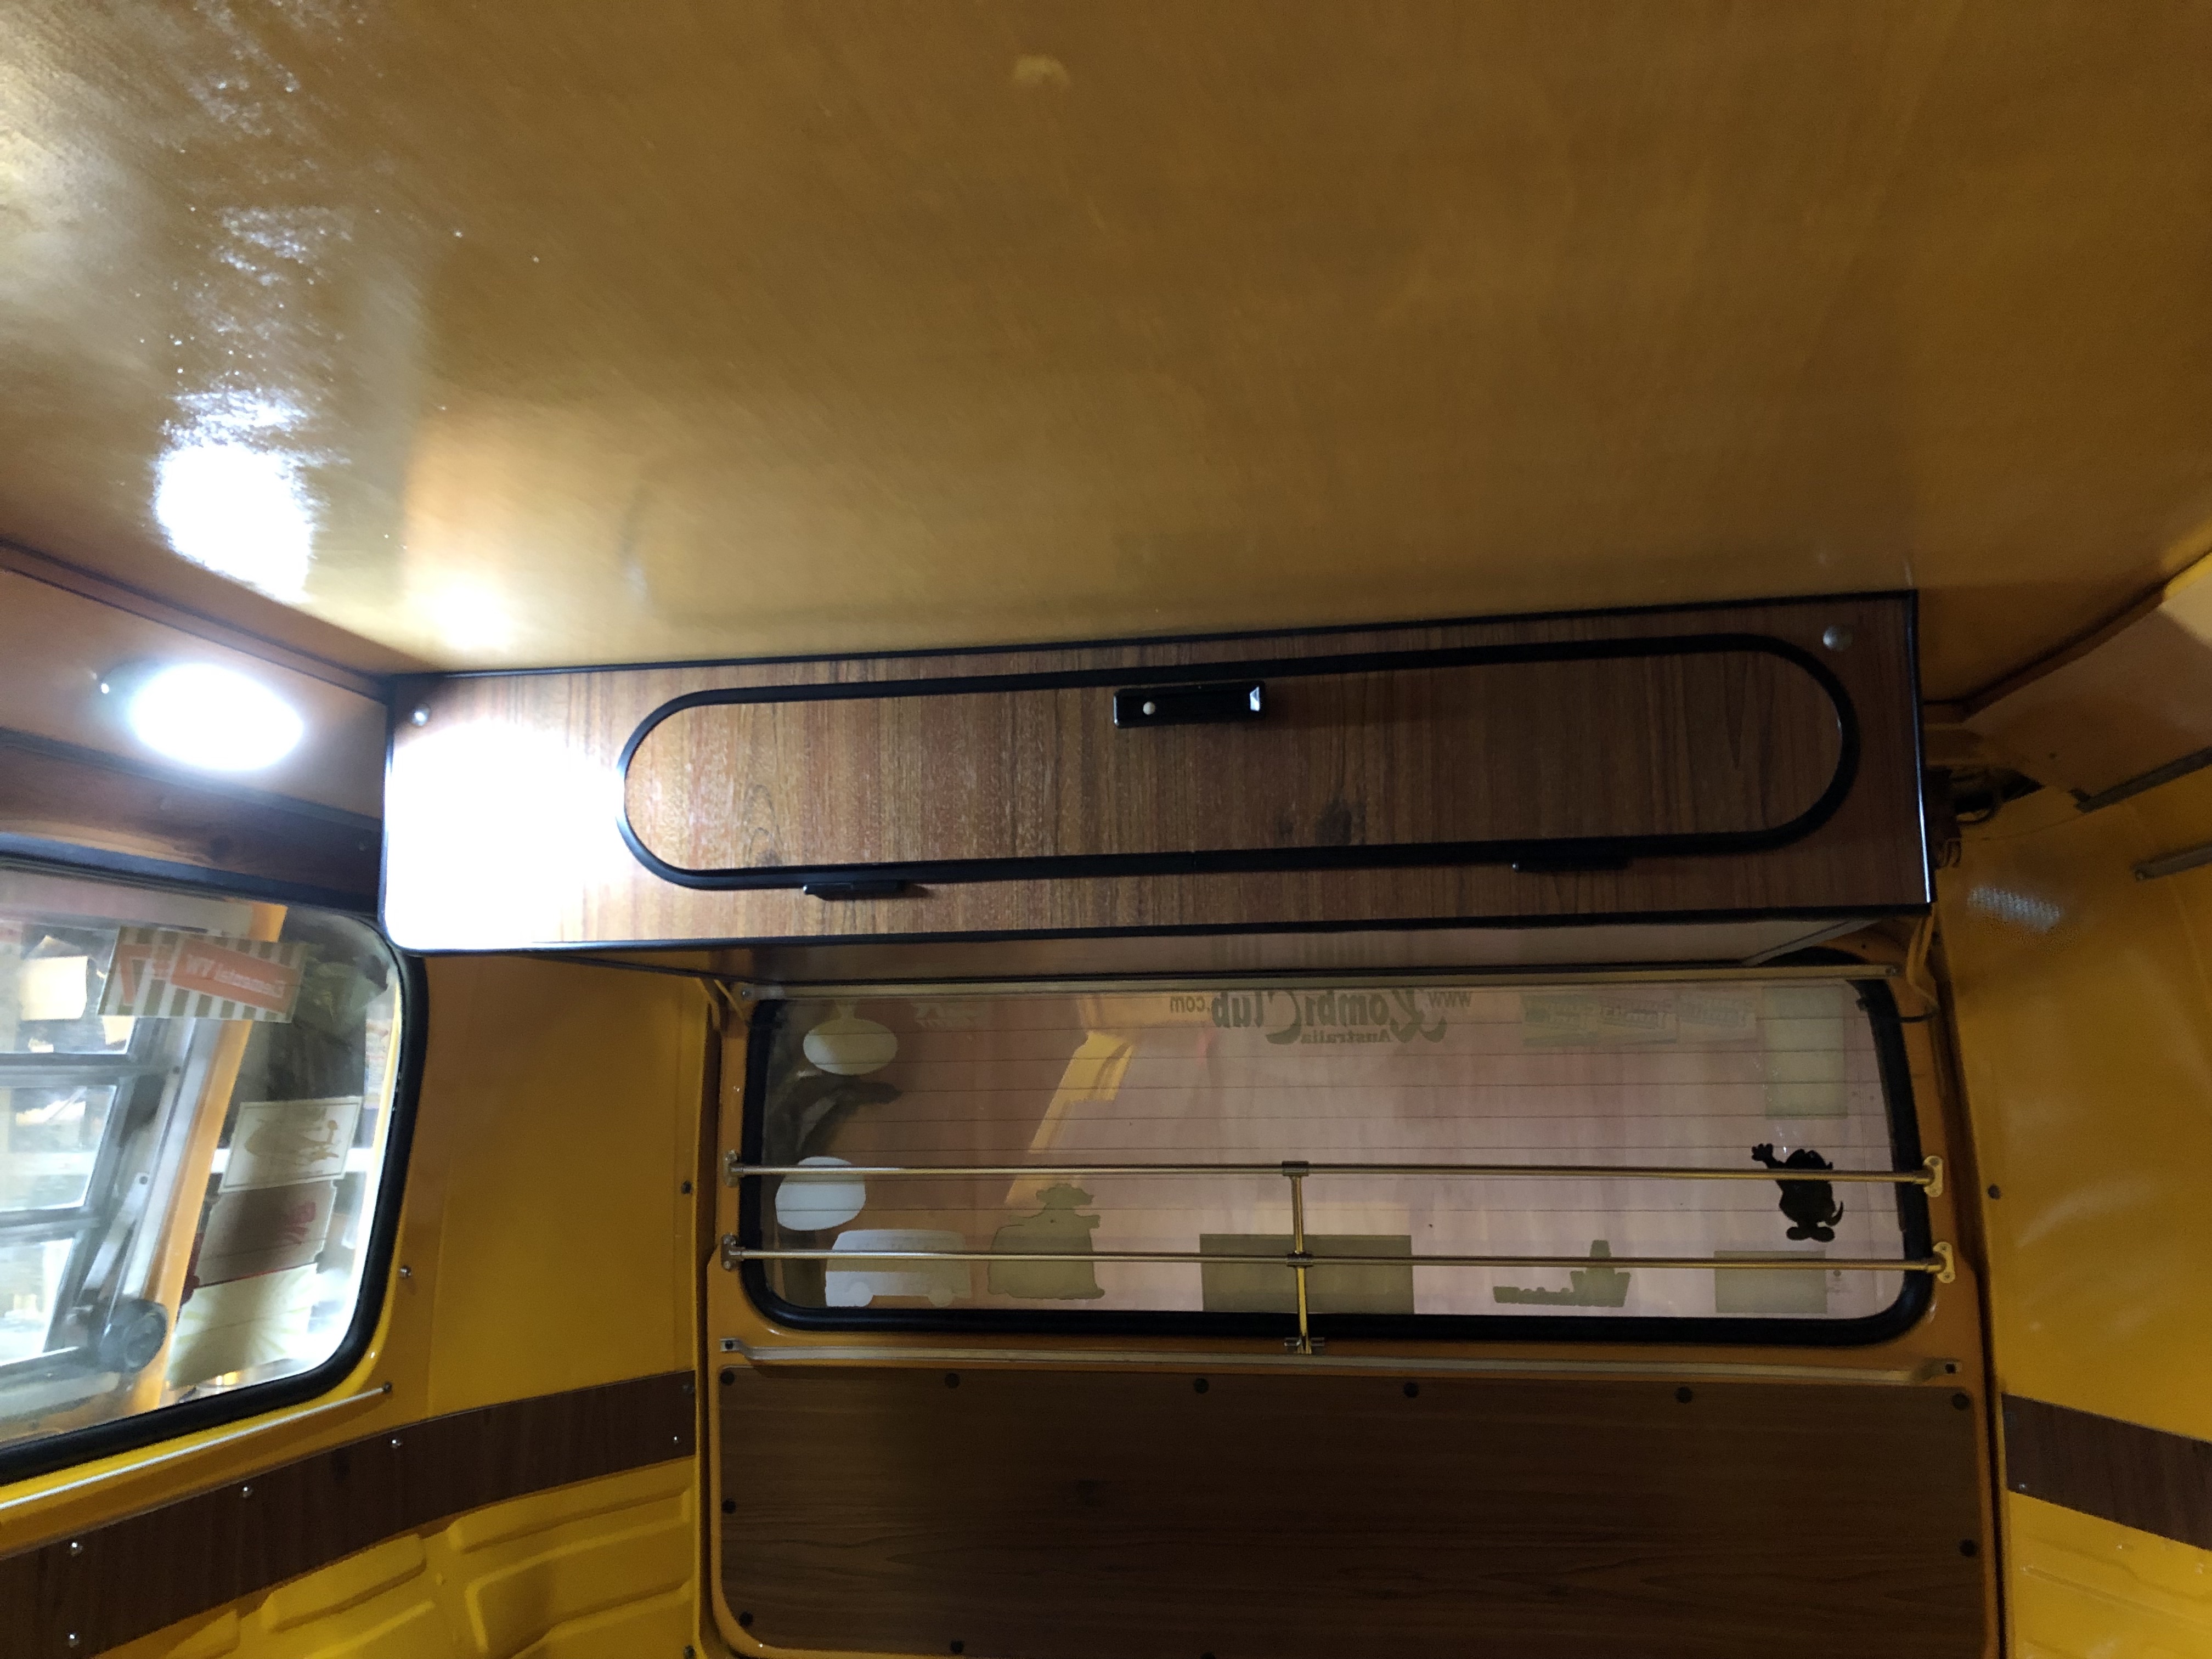
With this complete, I could then set about restoring the overhead locker, which considering its 42 years old, needed a few laminate edges re-gluing and the base wood sanding back and varnishing.


The laminate has been scrubbed with furniture polish, then polished again using a microfibre cloth finally having a liberal polish with bee’s wax followed by refitting and an LED light mounted next to it
Before I could move on to the side wardrobe unit, we needed to refit the rear left window and opening quarterlight window but on looking at them, it became obvious that the quarterlight would leak. At £240 for a new window, we opted for a sliding window at a fraction of the cost, not only that, it fit really well.


Much better!
The wardrobe unit looks worse than it is, again its 42 years old and needs some tlc – nothing a re-varnish and the laminate polishing back to a shine. The rubber trim strips will be renewed and a new plywood back mounting on.


All of the hardwork and effort is paying off, bit by bit Major is looking good!
October and its been three months or so since I last updated the build, its still going well and the interior has all been cleaned up, varnished, beeswax polished and refitted.
I’m please with how it looks but looking back, there is one thing I wish I had changed, the units had clear wood varnish applied but the worktop had mahogany oil applied and it looks superb. I only discovered the oil after I had done refitting the units.
The wardrobe unit has had a new back fitted and the cracked laminate removed, glue cleaned off and varnished and the rubber trim replaced and to cap it all, new handles.


The coolbox has been refit, the lids both had cracked laminate, this was removed and varnished, the grill repainted satin black and the laminate on the body of the unit beeswax polished.


Bedbase refitted, all of the laminate was good so this was polished and new handle fitted.
The main kitchen unit has had a complete refit, the water tank, drains and sink/worktop removed as I dont want to use it, all new shelves cut to size, varnished & fitted, doors had cracked laminate removed, new door handles and a new worktop.


New carpet fitted and looking nice!


RCD unit and plugs mounted, wired up and the connections checked. Just got to locate the outside plug and connect the cables up & earth it out.


Busy busy busy!
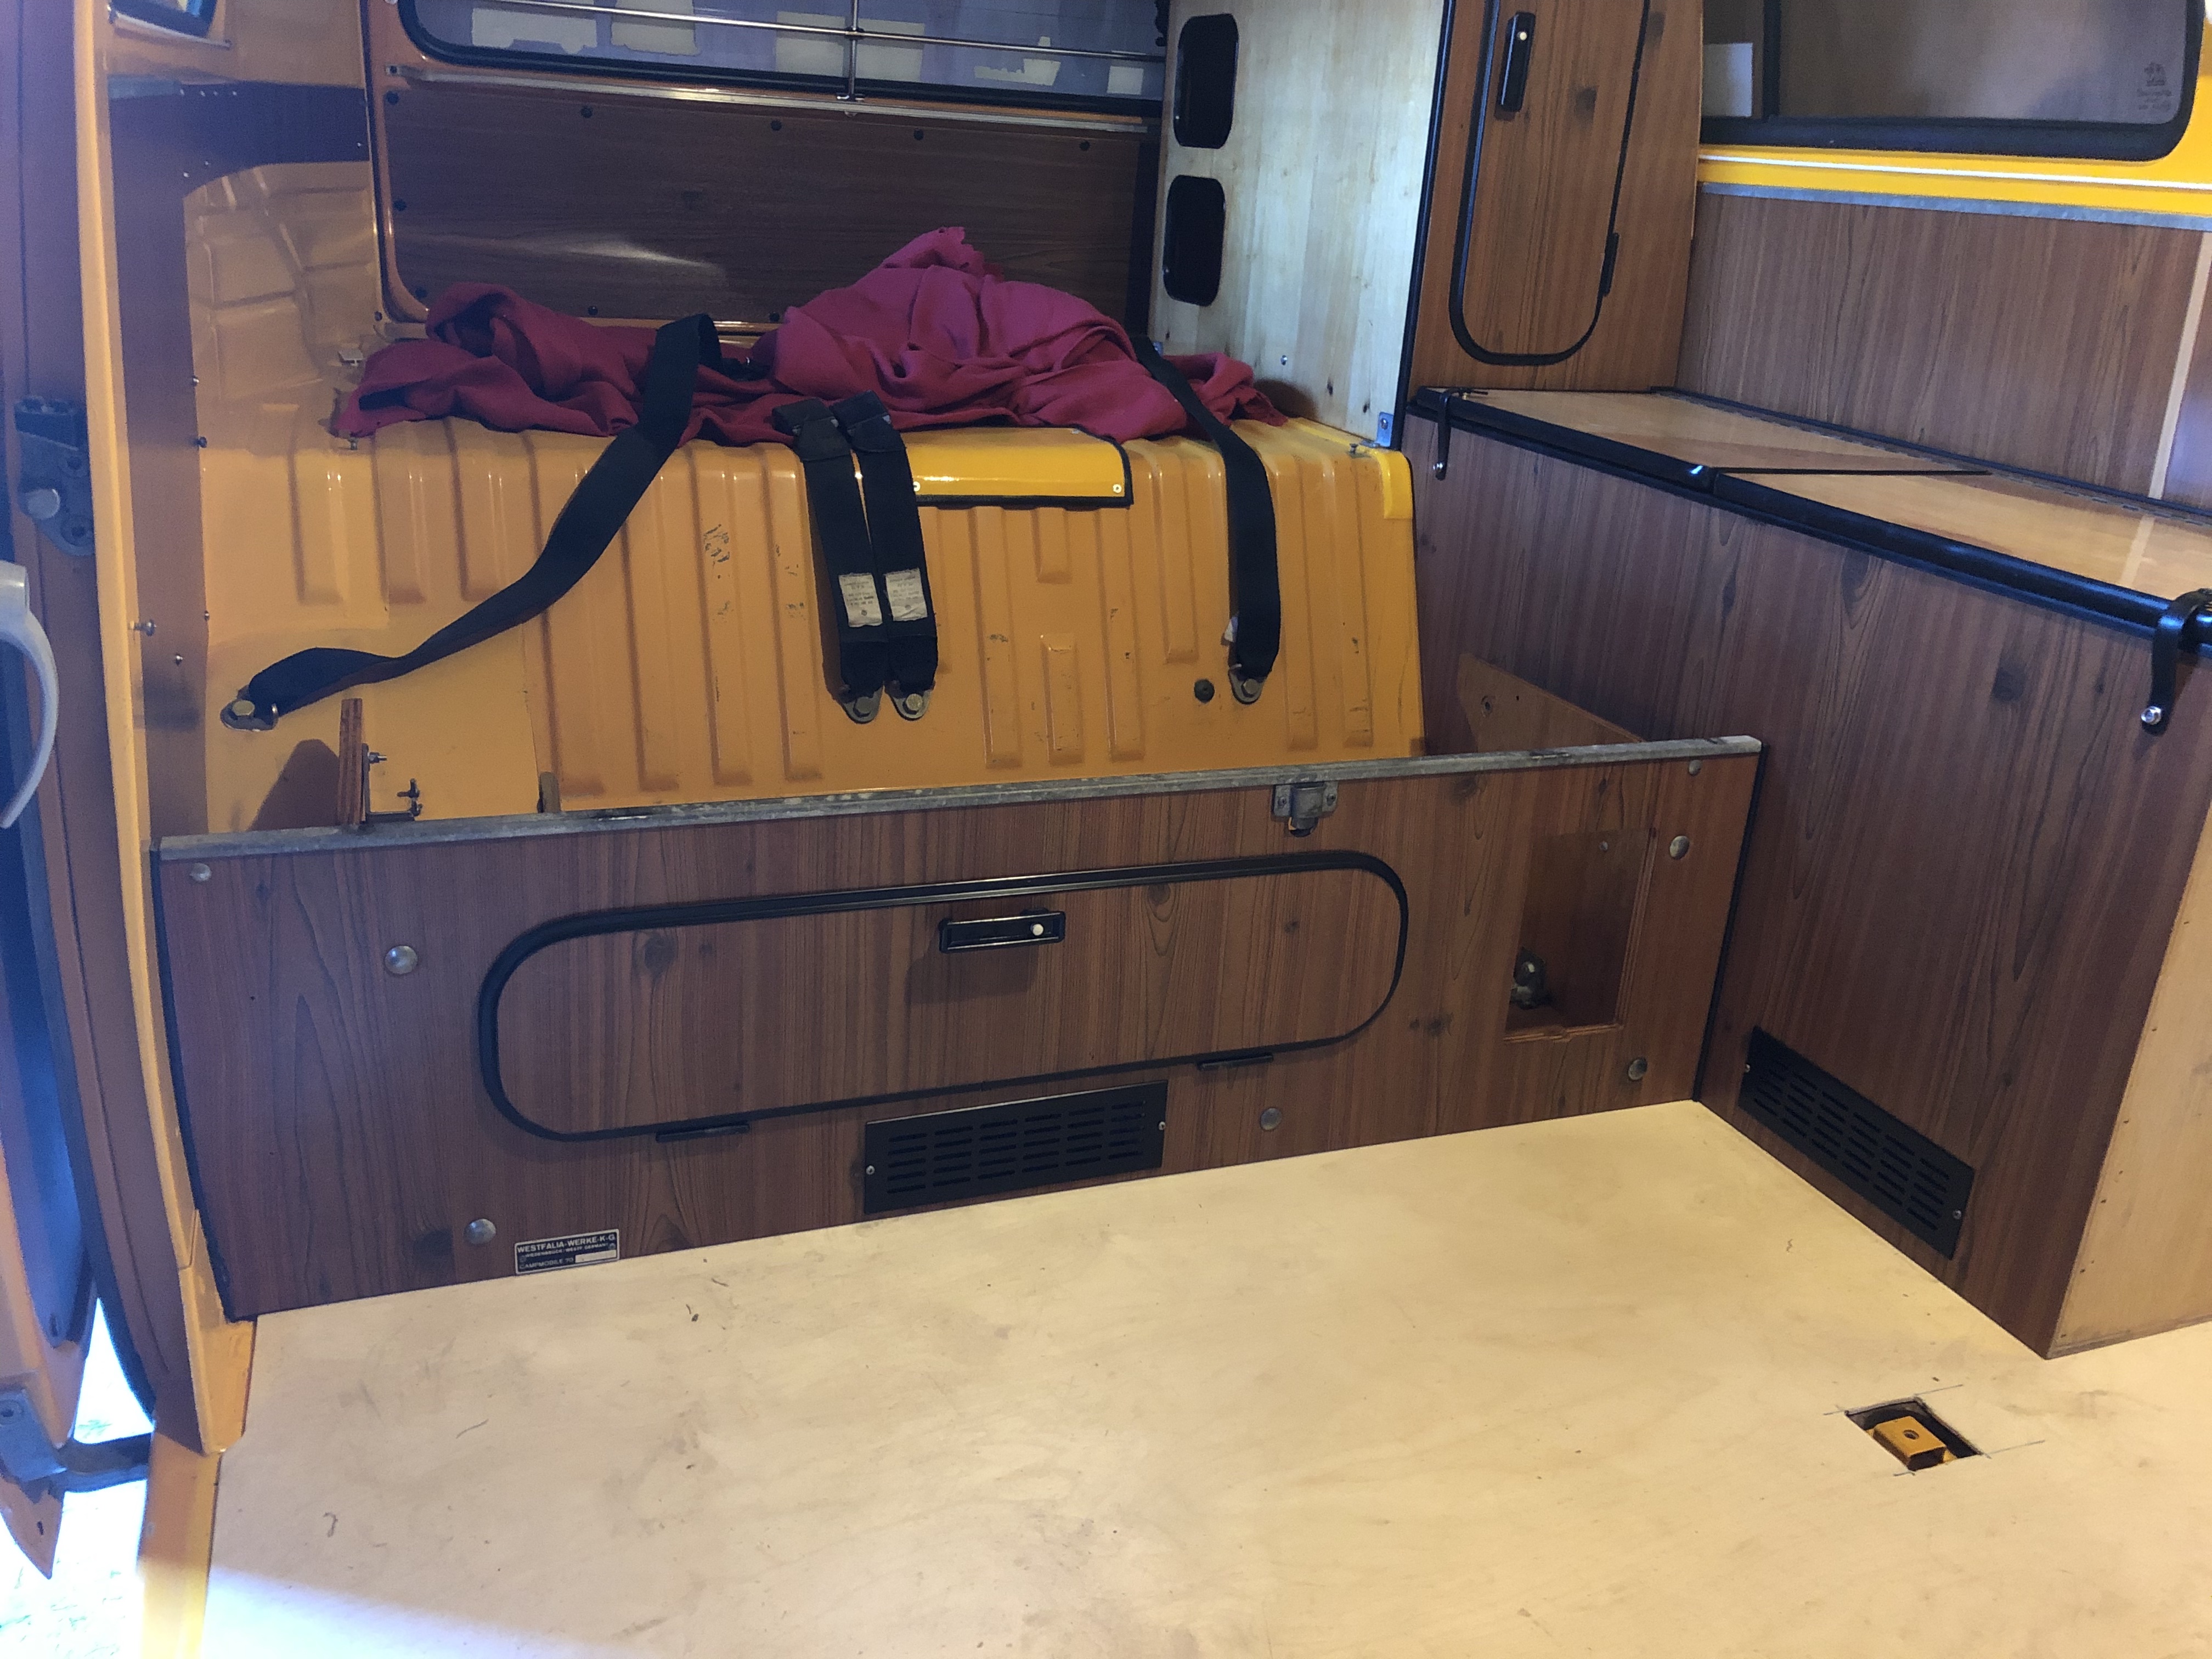
As planned, the next stage of restoration was the engine lid, which turned out well. The lid is in excellent condition with light surface rust in places, it needed a good clean up, the old Dinitrol cleaning off and repainting.


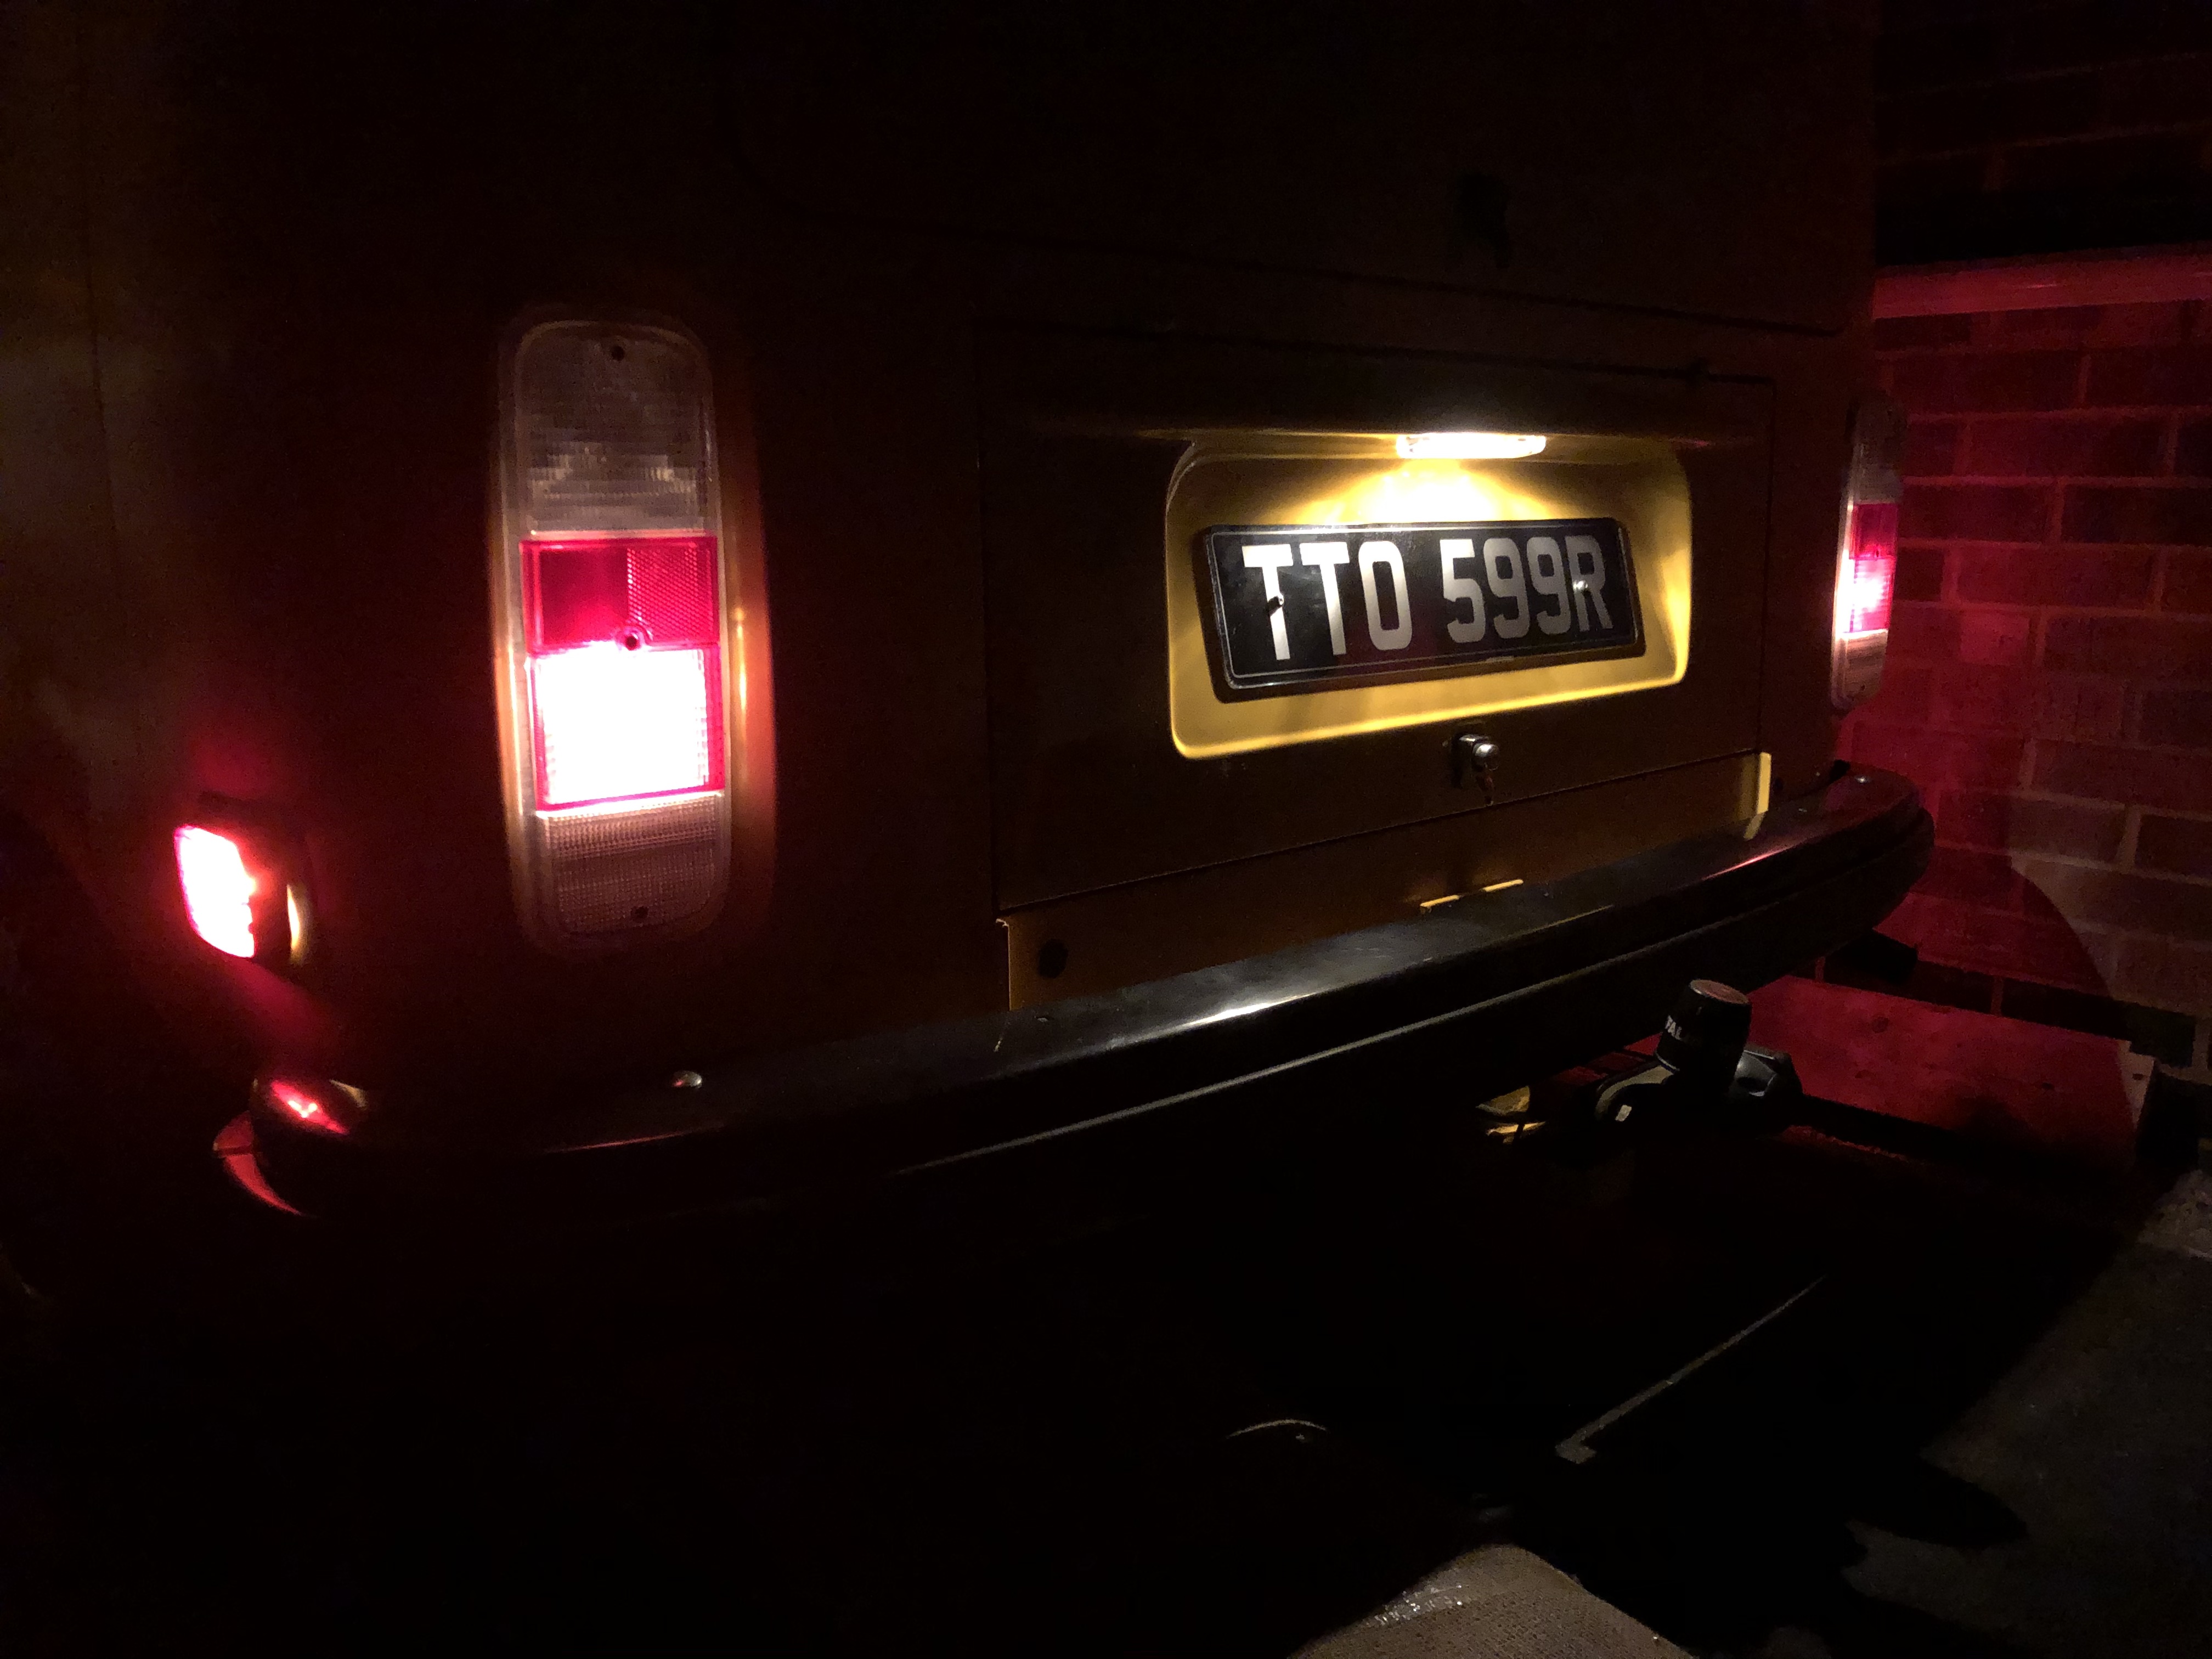
With a new seal, number plate light, degreased lock assembly and new hardware to mount the numberplate, the lid looked great. Another job well done!


And all lit up.
The final piece of the bodywork puzzle was to repaint & refit the right hand cab door. What worried us was the condition it would be found in, based on the left hand door needing major reworking. A pleasant surprise awaited us!
The door had no rot anywhere simply showing signs of surface rust, this was a nice easy rub down and repaint.


It did, however, show 40 plus years of dirt built up in the crevices along with a 1 dollar coin tucked away!


With both cab doors rehung as bare doors, they needed the windows refitting along with the trim pieces, a job which I was not looking forward to doing as the chrome trim’s are fiddly and delicate to fit.


The right hand door built up easily, the left hand door didn’t. The chrome trim twisted on winding the window up needing a new trim, the vent window frame got stuck when I refit the frame with the second trim piece but we got there!


Those black Brazilian door mirrors look great and suit Major’s colour scheme!
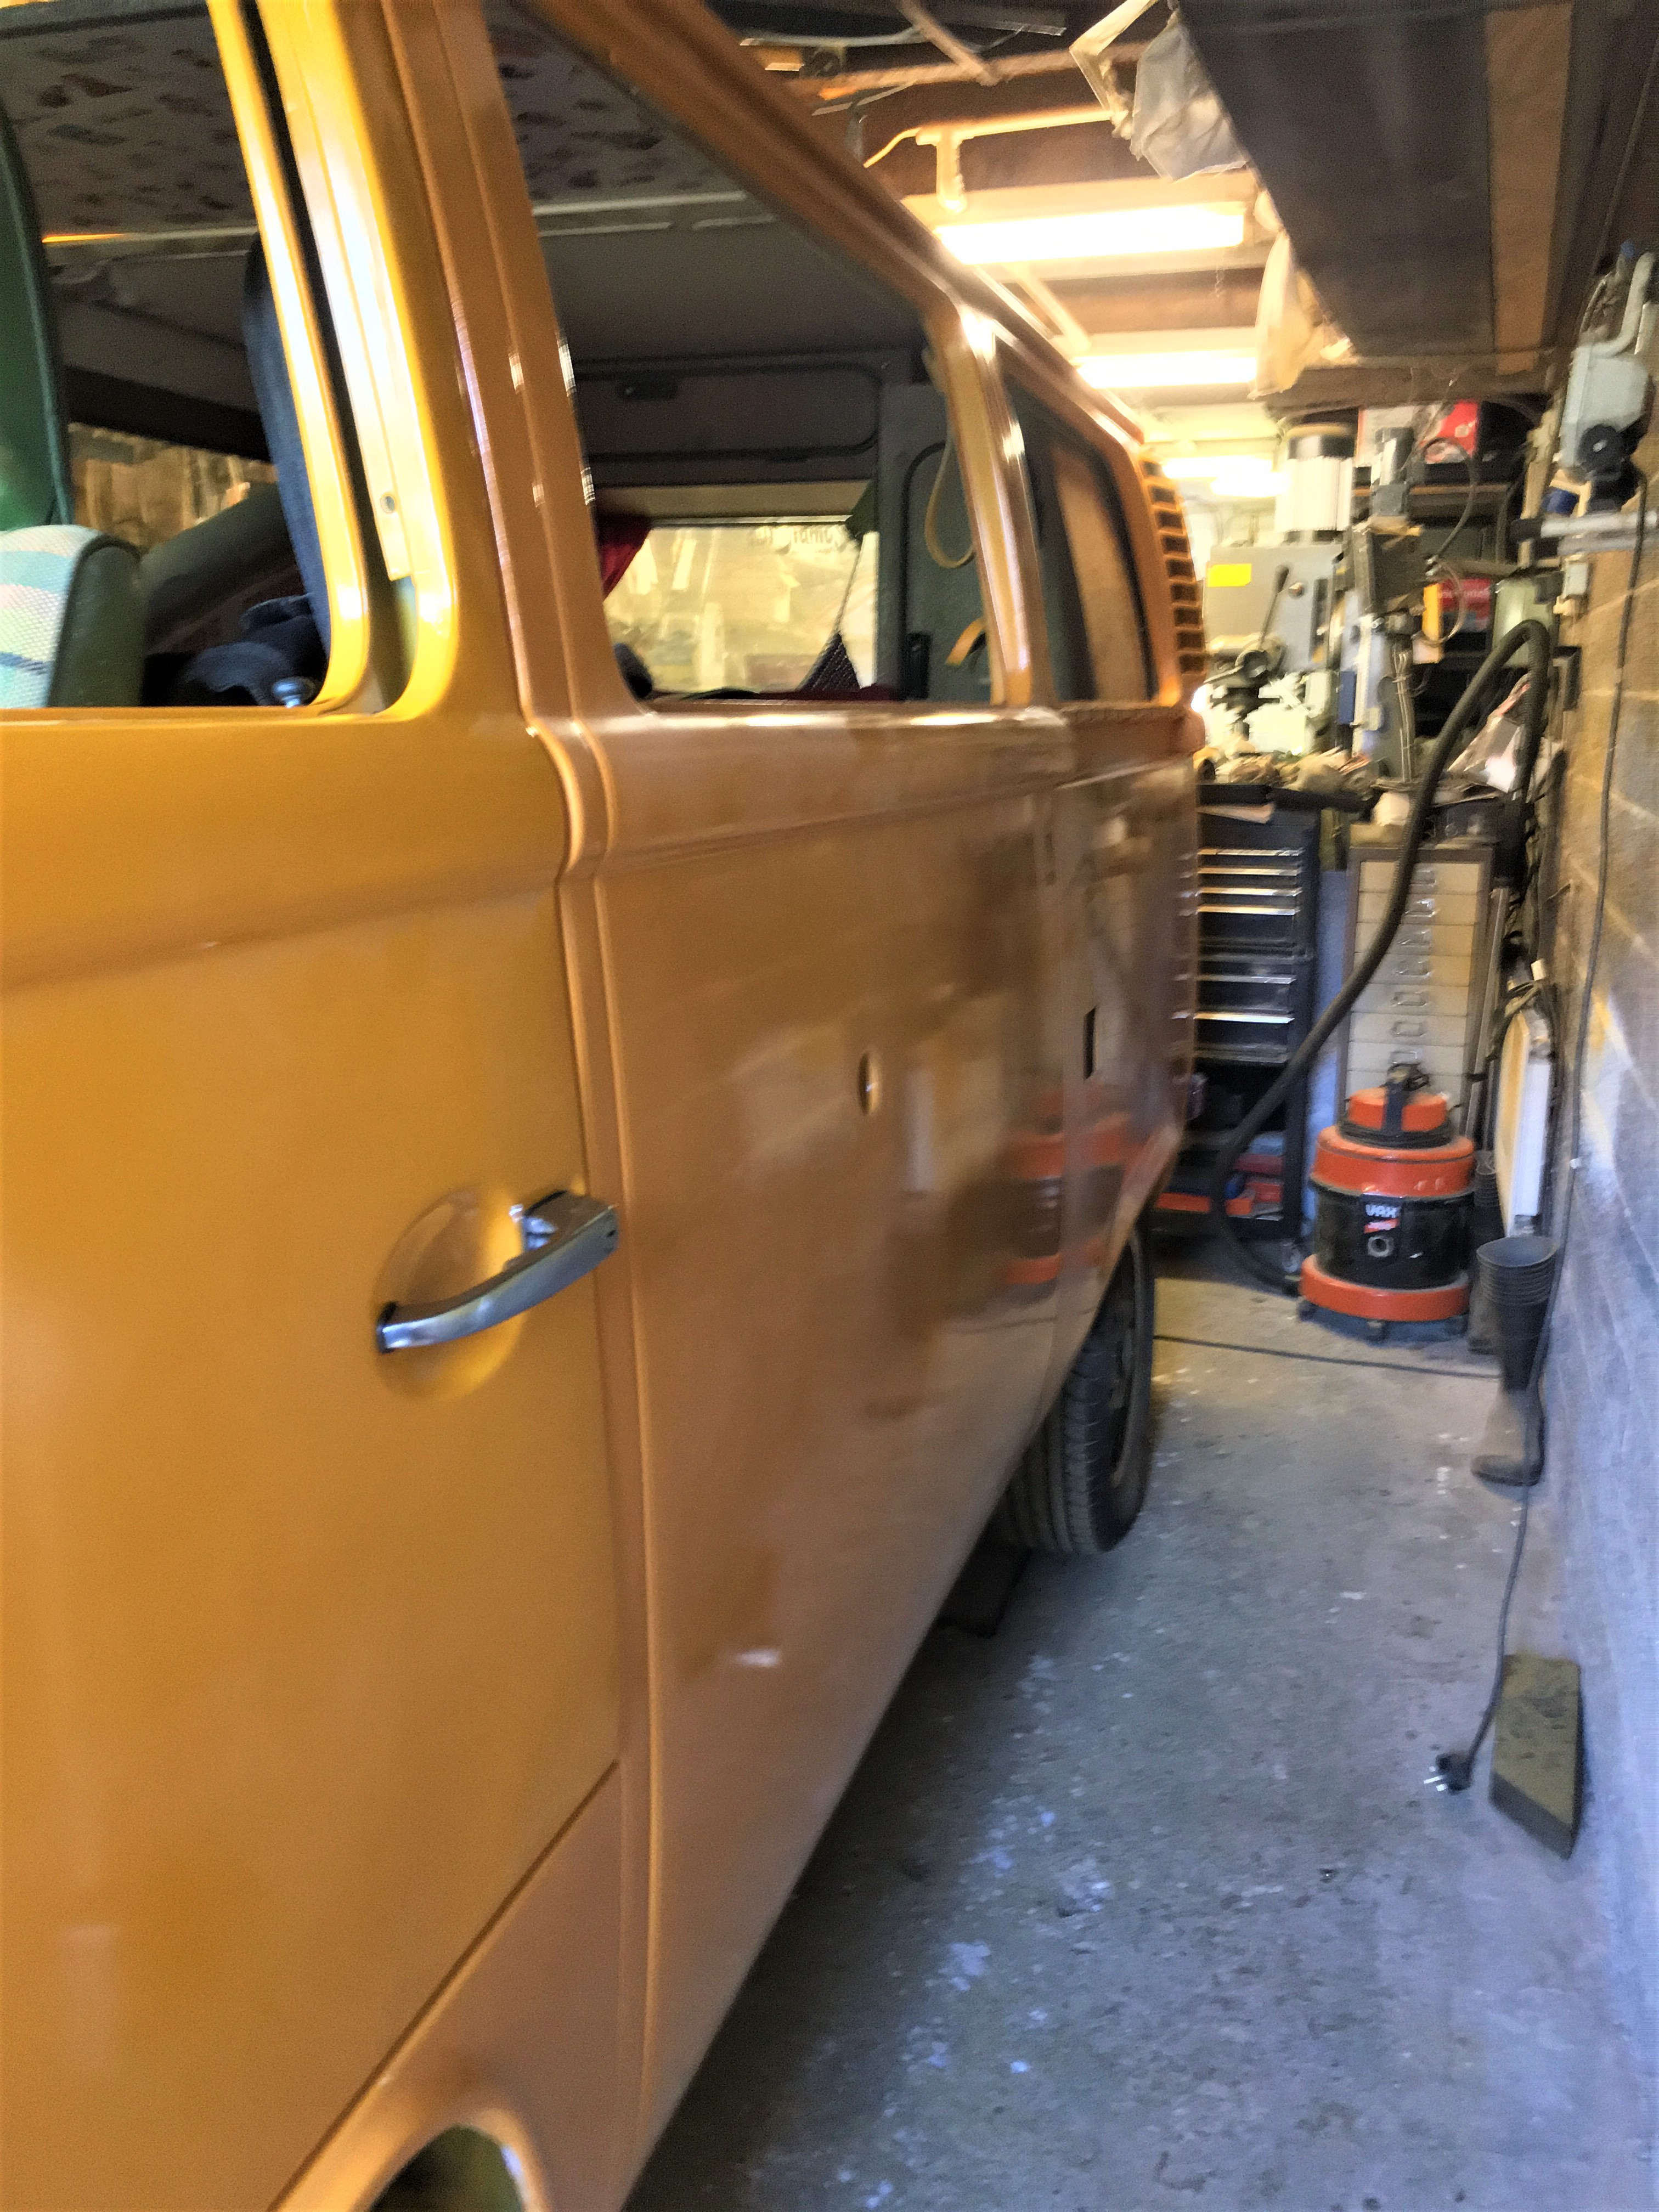
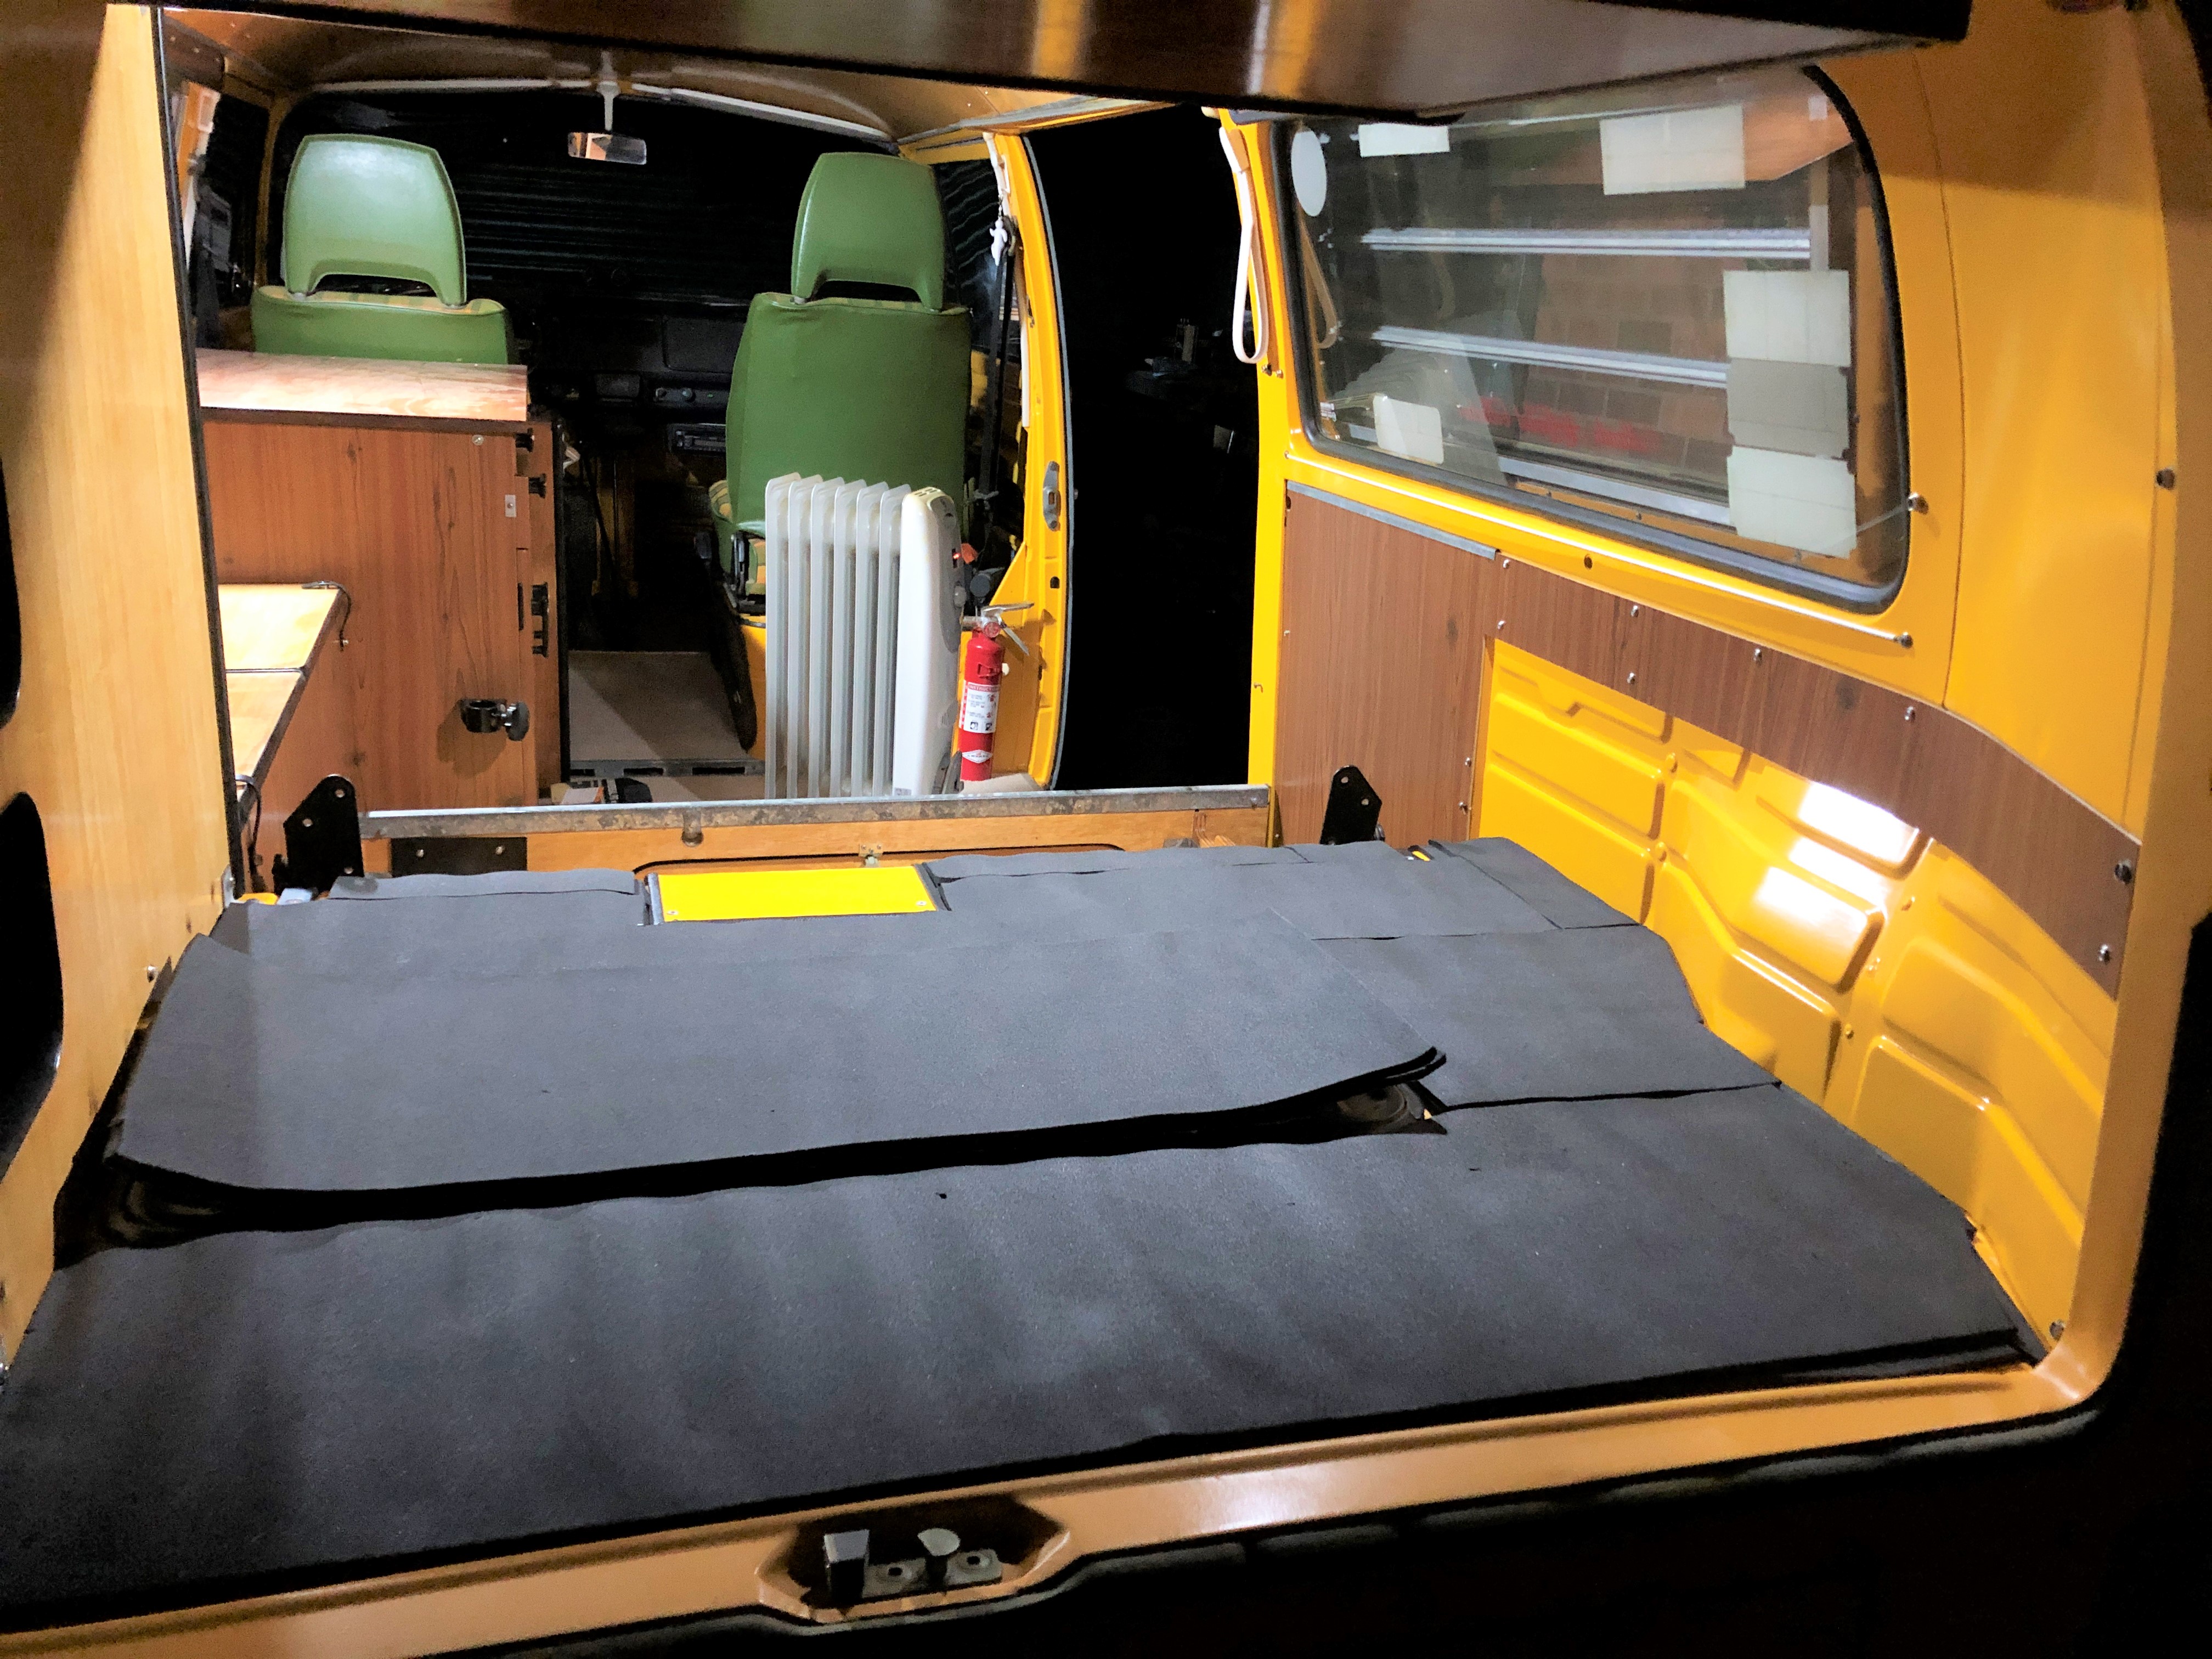
Im getting through the various parts of the rebuild, all that is left is some carpet trim to fit, clean the wheels and fit new tyres, upholstery and off to have the new motor fitted.
Its been a while and quite a bit more has been finished including sourcing a very hard to find cupboard cover, which has been renovated and fitted, and the interior furniture is now complete.
From rough looking to fitting in with the theme!


The tyres have been swapped from low profile ones, for lowered buses, to some proper van rated tyres which are correct load rated and look more the part for camping and the wheels have been cleaned, the old lacquer removed and re-coated. These look good.


The carpet I talked about needed an edge trim fitting, which is done, the cab walk through had two Madmatz mats to fit. Done. The wheel arches have mats fitted and its all looking nice. Another job done.


The underneath of the bed is a steel shelf above the engine, which used to get cold. Gusbus has this part insulated and it keeps the cold at bay, this was sorted with two layers of 6mm thick insulation. Should be toasty warm!
The eventual plan is to have a solar system for powering iPads, phones and the fridge via a leisure battery and solar system along with a 240V hook up. The hookup has been tidied up, USB charging plugs fitted and a 3-pin plug for the fridge on a fused circuit.


The Westy’s came with a storage box which sits between the walk through section, which is handy for keeping Douglas’s food in. It was quite tatty looking and needed some tlc..its been varnished and had new foam and a new cover. Much better!


The final little thing, to bring the build up to Easter 2020 is an armrest we recovered, quite well too I might say!


Major is now sat in his garage, nice and warm waiting for some control equipment for the solar system and for his engine / gearbox to be removed. There is a panel above the ‘box which needs painting, the gearbox cleaning and servicing, engine bay painting.
May 2020:
There’s summat missing 😮
Removed the engine and gearbox to address the engine bay as it is covered with 43 years of dust, rust, oil and grime and to be honest, it looked a mess and needed attention. The chassis rails had old underseal and rust, the gearbox hanger, grime and the panel under the fuel tank very rusty.


Yes, its a rusty mess.
I will admit to being daunted by the task of cleaning that little lot up. Where to begin, the answer, nowhere in particular. I didn’t start at one end, I went round in circles and got all of the loose rust off then went back with a brass bristle brush and kept on with that. Grease and grime, that was removed using an engine degreaser, scrubbing the paintwork clean. Bit by bit, it started to pay off and the old dirt and rust was gone.
The rust was treated with Vactan followed by three very good coats of Rustoleum to match the rest of the paintwork.


And the chassis rails, left hand wheelarch and battery tray:


All the effort and hard work finally paid off and its looking respectable again, no rotten areas either. Not bad for 43 years old.
The gearbox was covered in dry dusty soil, light corrosion and needed an oil change. The linkage fork was worn out, it was tired. Time for a refresh.
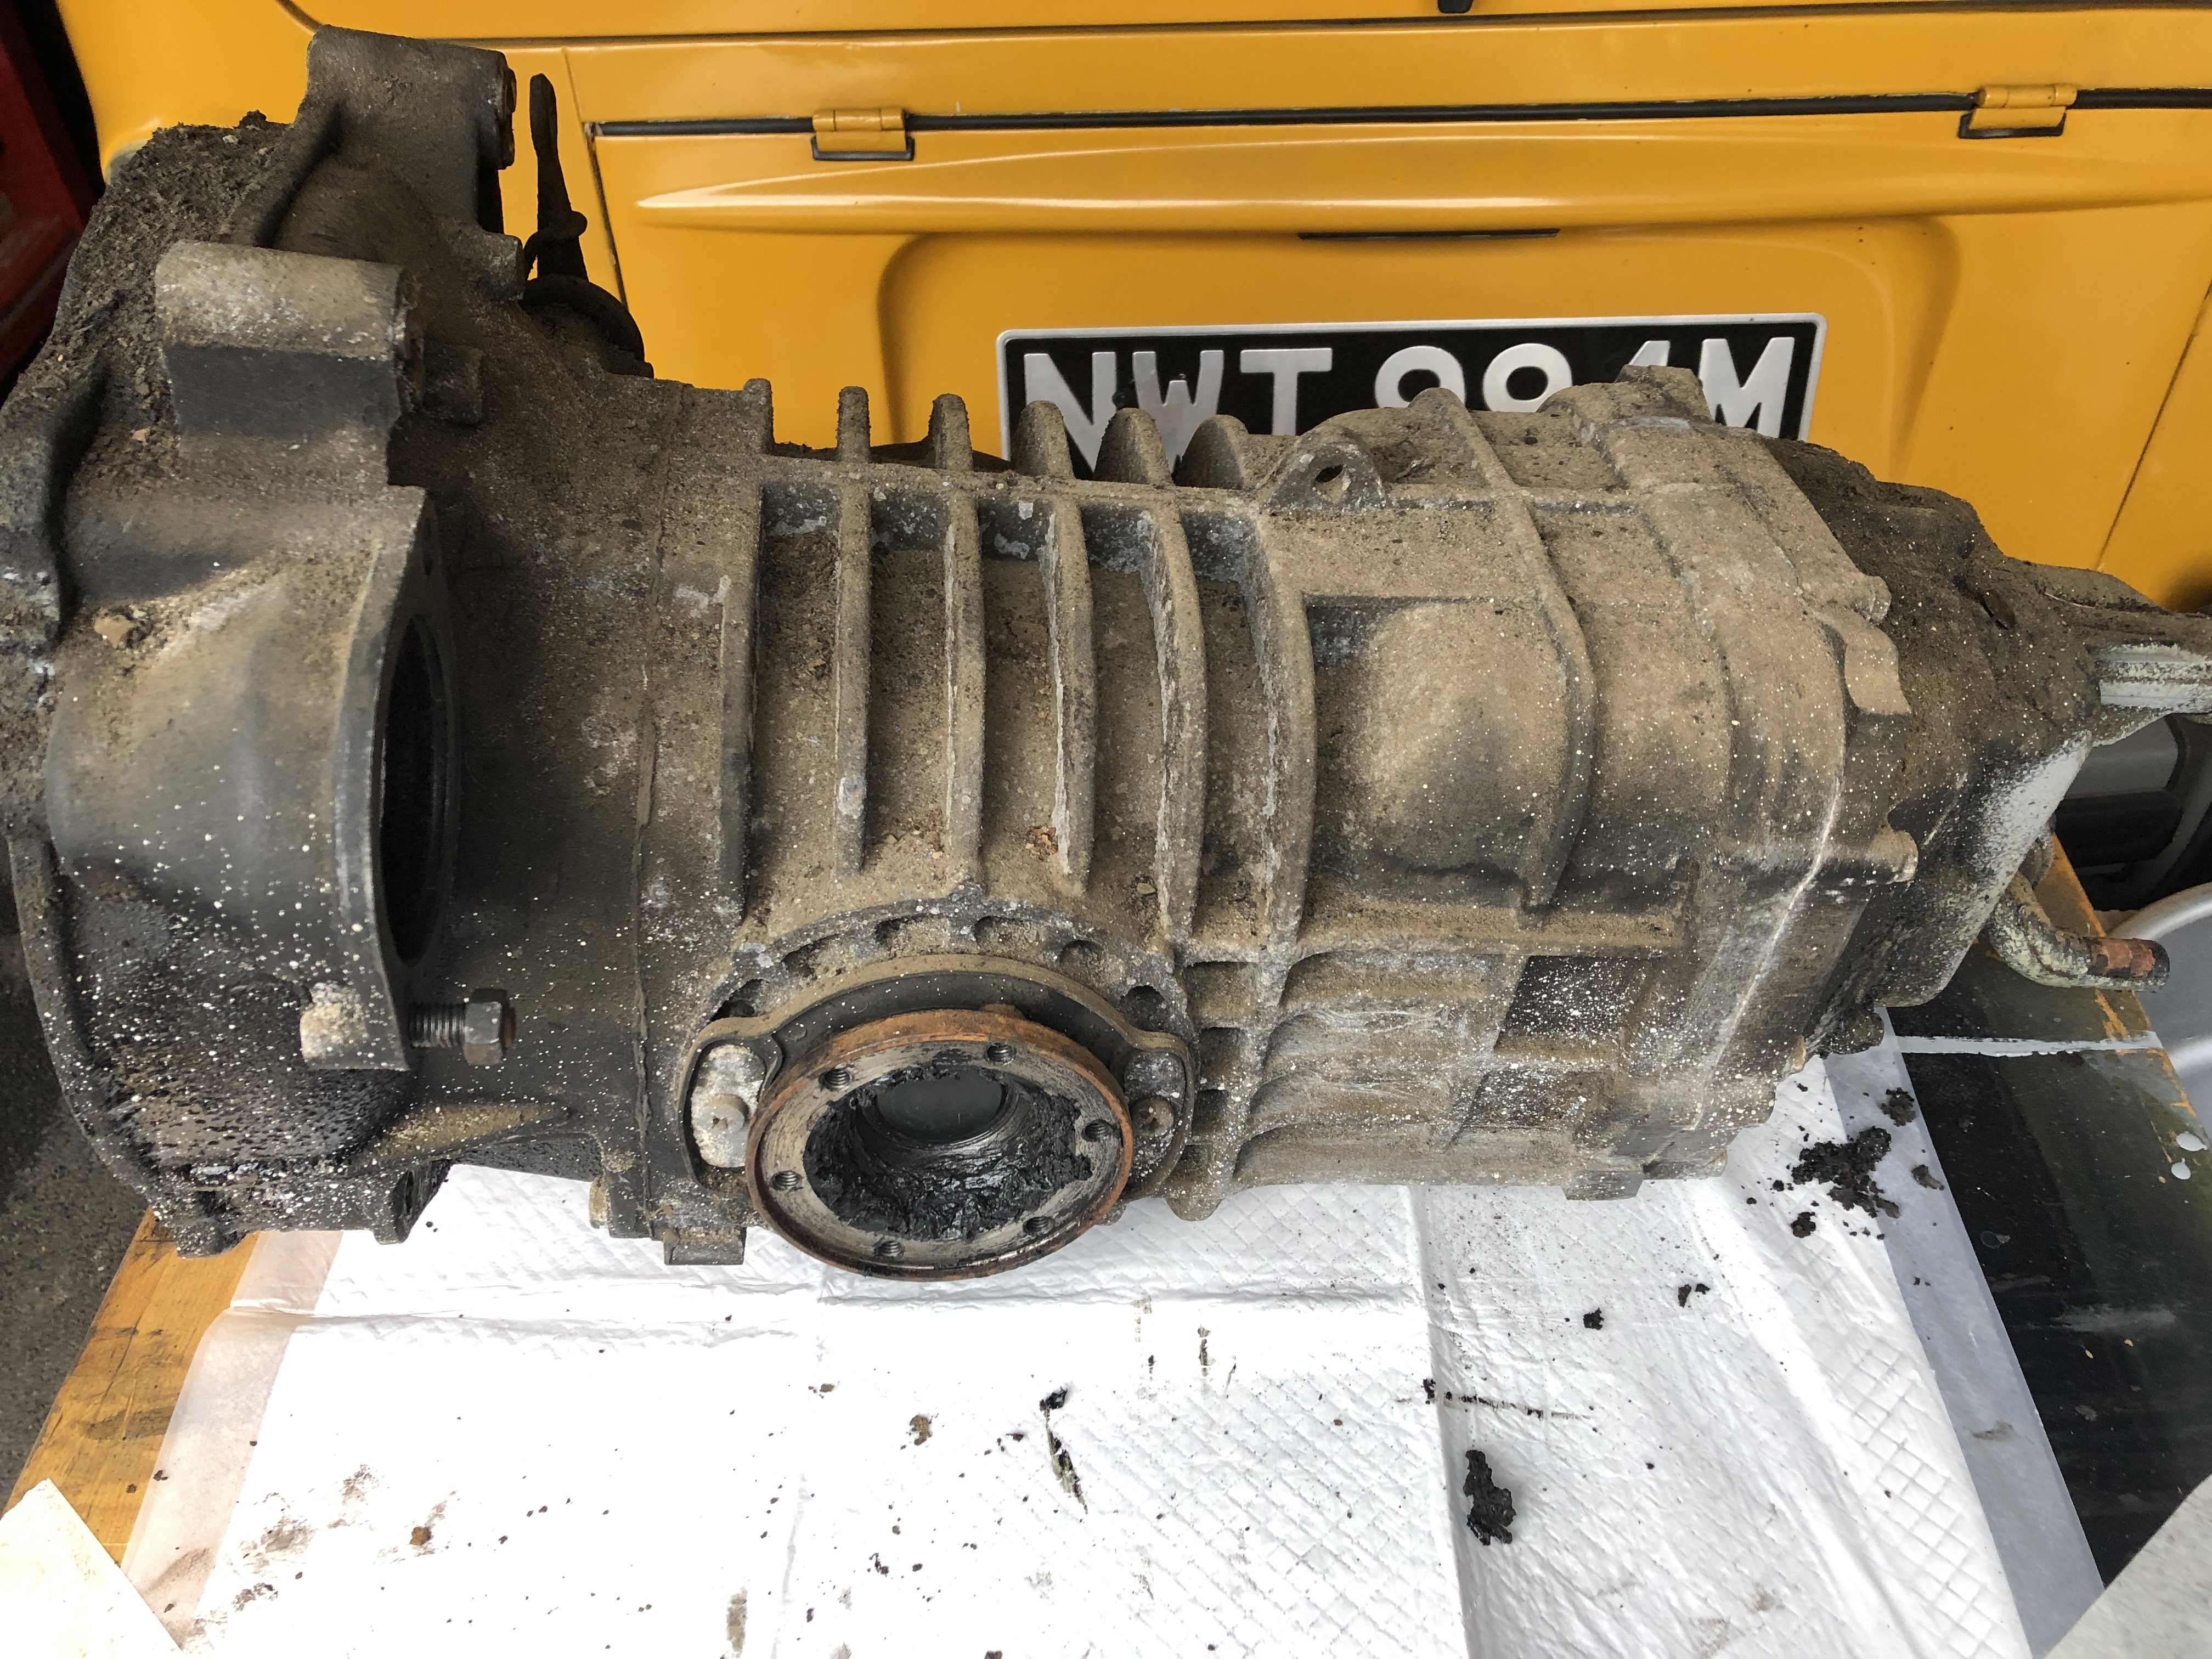
A good old degrease, wire brush up, two coats of grey paint, one starter motor cleaned up, contacts refreshed, three coats of satin black. Looks good.


Refitted and crossed off the list!
September 2020 we said goodbye to Major as he was going to have his new (to him) Subaru 2.0 motor fitted, we waved him off on a recovery truck!

The motor itself is a 2.0, same capacity as the VW one, so it sits right at home, comes with full documented service history (I have the history which came with it) and, upon fitting would have a host of service replaceable items swapped out.

The swap itself is quite involved as the engine needs an ECU, cooling system and adaption for mounting the engine to the chassis and gear box. Matt who did the swap knows exactly what in required and did a superb job.


To say I’m pleased is an understatement, the whole driving experience has changed for the better. Hills come and go, cruising is effortless which should give a far better scope for exploring!
Whilst Matt did the conversion, the last thing he did was mot Major. He passed after all the work we have done, which is pleasing and reflects the care taken in his restoration.

With Major back home, it means I can get the outstanding jobs ticked off the list such as door cards, upholstery, curtains, refitting trim and the solar system. On the whole, not a whole lot left!!


Keith at Kens Customs replaced the seat covers using NLA VW items whilst Madmatz supplied the door cards in matching trim (and also the vapour barriers). The fit was excellent!


Of the bodywork, after refitting the chrome headlight trim and side step, it needs a good polish so I am gently t-cutting each panel the giving a liberal application of Auto Glym Wax which leaves the paintwork silk smooth.


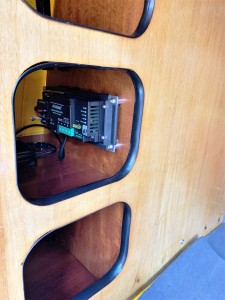
The solar system install went very well, all of the USB ports and accessory sockets all have power and the solar panel provides the 14.4 volts charge necessary. The spec of the system is:
- Photonic Universe 180W Solar Panel
- 30A Isolator / Circuit breaker
- 250A Votronic Dual MPPT Charge Controller
- Votronic Digital condition monitor
- 75A AGM Leisure Battery
- inline fuses & four way fuse box
- USB / Accessory / 3-pin 12V sockets
The solar panel itself is mounted on the roof which hinges & with careful parking, can get good sunlight throughout the day

The MPPT Controller and condition monitor are both fixed on the wardrobe with the wiring discreetly hidden in convoluted tube runs.

The leisure battery sits in the left hand battery tray, securely fixed down with appropriate current rated wiring for the charge side and the 12V feed side down to the sockets.

From the outset, our intention was to have USB / phone charging points and an accessory socket for powering the fridge. In addition to those is a 3-pin socket capable of up to 50V DC max.

The system works exactly as it should, the MPPT looks after the leisure battery’ demand when being used, the various sockets all work (which they should but I’m not electrically minded). Another job done!
There is not many things left on the to-do list, in no order:
- Trim the rear bed cushion foam and fit inside the cover
- Waxoyl the battery tray undersides
- convert the interior led lights from the main battery to the leisure battery
- kit out for camping & enjoy!


Its almost been a year since we go Major finished and enjoyed a few adventures in him but since late September 2021 he sat in the garage and we didn’t use him, I had a stomach bug and didn’t want to go far, certainly not camping.
With that said, January came and went quickly and Major was going to get a set of bumper over-riders front and rear. Setting too and getting them trial fitted for mounting locations and the gaps to fit around the bumper tweaked (these are reproductions):

Whilst the over-riders look great as they painted up really nice, especially the front, the rear bumper looks awful as the lacquer went milky last year after it reacted with something or other..


In my mind, this week was set aside to repaint the rear bumper after I had renewed the MOT, but with all things considered luck was far from on our side. Checking in for the MOT and everything was spot on, lights, seat belts, ball joints and gaiters. Front brakes, both did exactly what they should and passed with flying colours. Rears NO. Rear left was perfect but the balance was way out and the efficiency of the right hand rear was almost nil.
Whilst there we popped the wheel and brake drum off and found grease everywhere, it was a mess & no wonder they didnt work, the seal was damaged and sat crooked, it let grease past it.


We did persevere and get the MOT renewed as cleaning the drum and shoes got the balance & efficiency needed to pass but this weeks job is to clean everything up and replace the seal.
The contaminated brakes have all been cleaned up, rebuilt with a new seal, new shoes and the adjustment set as close as possible so a test drive is in order to bed them in a bit, inspect and readjust.
I had Friday to myself so the bumper was cleaned and the old lacquer removed, paint keyed up and resprayed with Rustoleum Satin Black with hard coat lacquer on top. It looks much better!


There are a few little odds and ends to sort out:
- Fit a new windscreen seal (the current one has cracked)
- New fuel pump, the current one is going noisy.
- Left hand front wheel bearings to replace
- Oil change
It will soon be time to get out exploring again!
